1. Use the universal search bar to find features
Word has way too many features to remember the location of them all…and you don’t have to. There is a search bar located by the View tab that says “Tell me what you want to do.”
Just type in the name of the feature you’re looking for. The search bar also has a dropdown menu with suggestions you can click on. Hit Enter on your keyboard when you’re done typing or click on an option from the dropdown menu. Word will find the feature and present it to you.
2. Word can autocorrect capitalizations
If you’re terrible at making sure all of your words are properly capitalized, Word has your back. Click on the File tab > Options > Proofing > AutoCorrect Options > AutoCorrect tab. Click all of the boxes in this tab to ensure that Word will correct your text automatically if you type two capital letters in one sentence, forget to capitalize a day of the week or the first word in a sentence, or accidentally tap on the caps lock button. Then click OK, and then OK again to finish.
3. Create your own default formats
The formatting options at the top of the screen are handy for automatically making text into headers, titles and such, but you don’t need to use the preset fonts and colors. You can customize them in two ways.
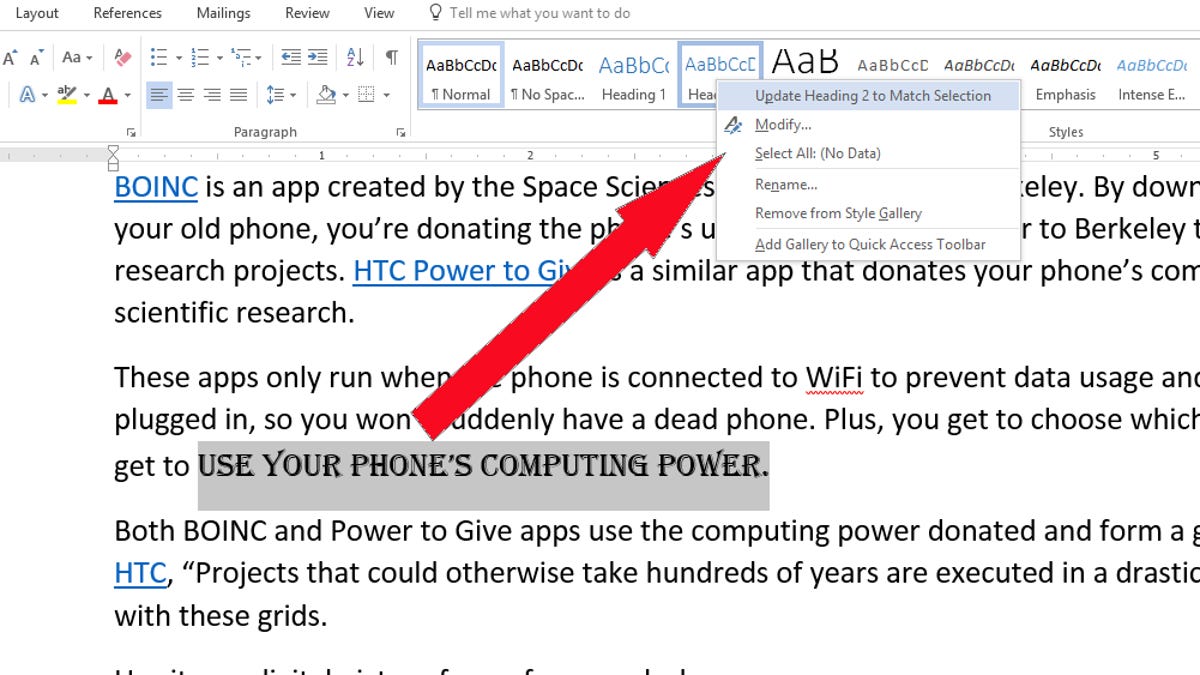
The easiest way is to copy and paste some text that you like into your Word Document, select it, right-click on the formatting option you want to change and click on Update to Match Selection.
Another option is to right-click on the formatting option and choose Modify. From there, you can change your font, spacing, size and more. Click OK when you’re done to save your choices.


Update to Match Selection will copy the formatting of anything in the document.
Screenshot by Alina Bradford / CNET
4. Hide spelling and grammar problems
Sometimes the best way to get through writing a story, report or whatever is to just write. The blue and red lines under various misspelled words and poor grammar can be distracting and hamper your progress.
You can easily turn off these spelling and grammar checker by going to File > Options > Proofing > Exceptions for and checking both boxes. This will turn off the spelling and grammar for just the document you’re working on unless you select the All documents option. When you’re ready, go to the Review tab and click the Grammar and Spelling button to run a check.
5. Recover a document you didn’t save
Did Word shut down before you could save your document? It’s not lost forever. Your computer saved it as an ASD file. Use these instructions to find your Word document again.
6. Change the menus
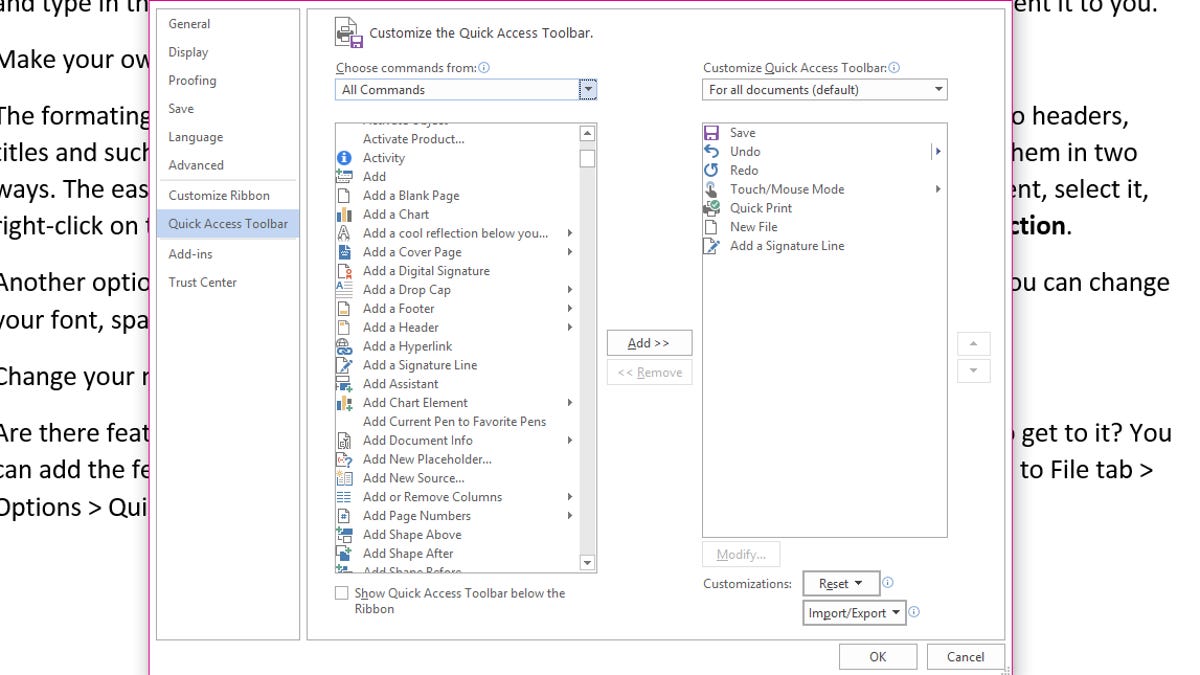
Are there features that you use all the time, but you hate clicking through the menu tabs to get to it? Add the feature to the quick menu that’s found at the top-left corner of the screen.
Go to File tab > Options > Quick Access Toolbar and choose All Commands from the dropdown menu. Then, click on the command you would like to add to the quick menu and click Add. When you’re done click OK.


Customize your quick menu.
Screenshot by Alina Bradford / CNET
7. Go back to old saves
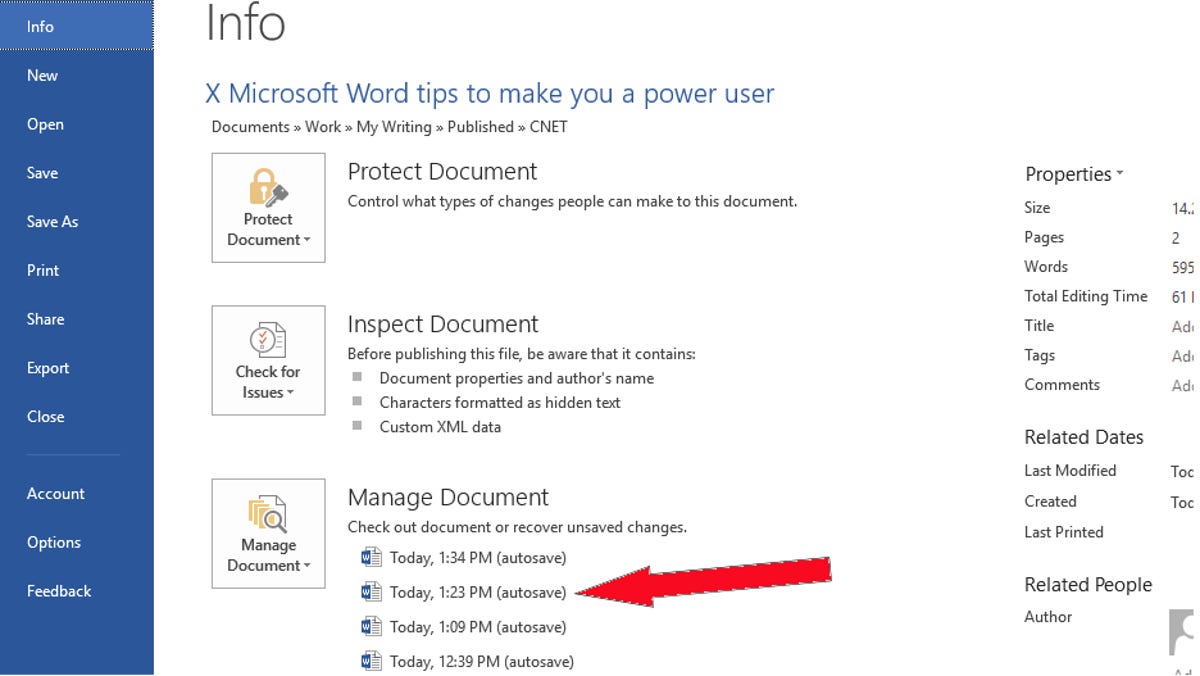
I think we’ve all sat looking at our work and felt like changing the original text was a bad idea. Luckily, Word stores your old versions. To go back to before you saved your changes, go to File > Info. In the window there will be a category called Manage Document. In the category there will be a list of your previous saves.
Click on an older version of your document and it will appear on the screen. At the top of the document will be the option to compare your new version to your old version and an option to restore the old version as your current copy. Click on your choice and follow the prompts.


It is easy to go back to a previous save in Word.
Screenshot by Alina Bradford / CNET
8. Cater to a specific audience
If your project is aimed towards a certain age group, you are going to want to write in a way that is understandable to the target audience. Word can make sure you’re doing this. Go to File > Options > Proofing, tick the Show readability statistics option and click OK. To run a report, go to the Review tab and click the Grammar and Spelling button.


A readability statistics report.
Screenshot by Alina Bradford / CNET
9. Save in the right file format
If you always need to save your documents in something other than Word’s default .docx format you can make Word automatically save documents in the preferred format every time. Go to File > Options > Save, choose the file format from the dropdown menu and click OK.
10. Turn off smart quotes
If you copy text from a Word document and paste it in WordPress, Blogger or another online text editor, you’ll need to turn off the Word’s smart quotes feature, or else your pasted text might have weird formatting.
To turn off Smart Quotes, click on the File tab> Options > Proofing > AutoCorrect Options> AutoFormat tab and then deselect the box to replace “Straight quotes” with “smart quotes.” Click OK, then OK again.


