Apple on Monday released iOS 9.3. With the update, Apple is adding features such as Night Shift which it claims will help you fall asleep easier despite staring at your screen after sunset.
Additional features such as allowing multiple user accounts on a single iPad, CarPlay enhancements and (finally) the ability to password protect personal musings in the Notes app can also found in the update.
Adding the option to protect a note — perhaps containing a bank account number, health information or even a daily diary — feels like it should have been in the Notes app from day one. Alas, it wasn’t, but Apple is intent on fixing that.

 Enlarge Image
Screenshot by Jason Cipriani/CNET
For those already on iOS 9.3, or those about to take the plunge, here’s what you need to do to secure a note in the Notes app.
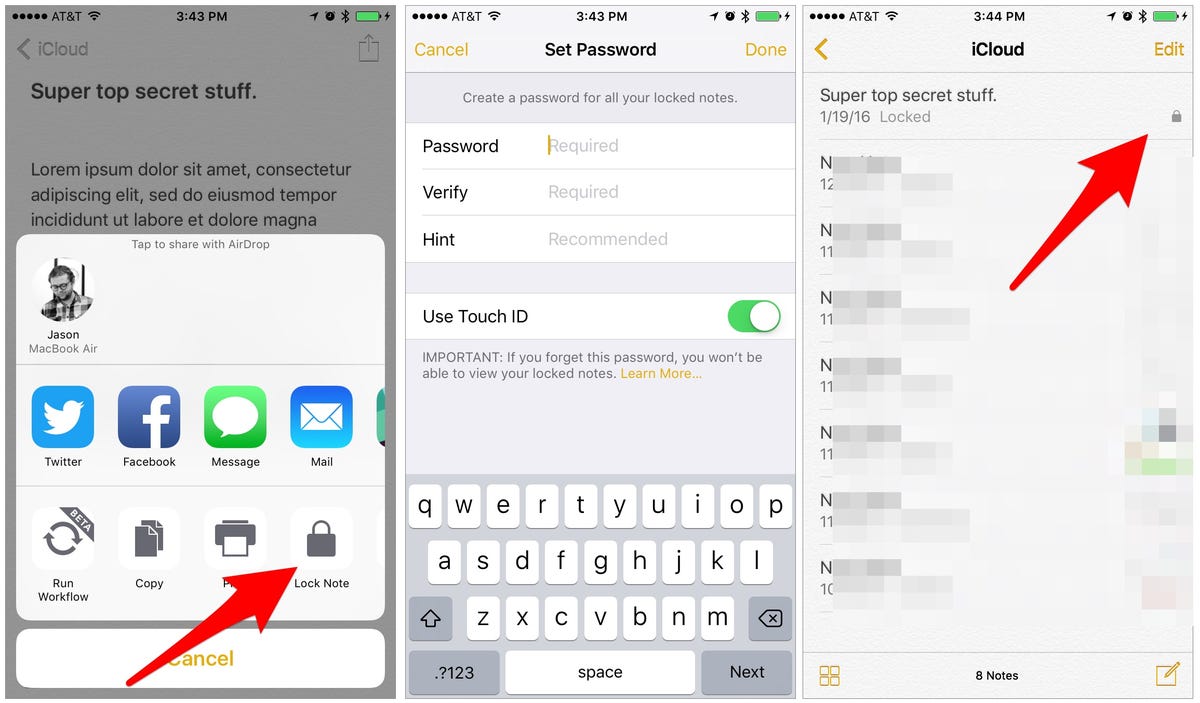
- First, start by selecting a note you’d like to lock down with a password or Touch ID.
- Tap on the share button in the upper-right hand corner.
- Select Lock Note from the list of options.
If this is the first time you’ve selected this option, you’ll have to enter a password and a password hint. Notice the warning just below the password section: You cannot access any secured notes on non-iOS 9.3 or Mac OS X 10.11.4 devices. If you’d like to use Touch ID in addition to a password, leave the switch in the On position.
Alternatively, you can set up or change your Notes password by launching the Settings app on your iOS device, then going to Notes > Password. This is also where you’d go if you want to change the password for your Notes.
With a password set, the next time you select Lock Note from the share menu, the note will be placed behind your password. You can identify which notes are protected when viewing the list of notes in your account thanks to a lock icon placed to the right of the title.
Editors’ note: This post was originally published January 19, 2016. It has since been updated to reflect changes in the official release of iOS 9.3.


