Related Articles


One could argue that we’re living in a post-iTunes world, one in which your iPhone or iPad doesn’t need a desktop client for data backup, music syncing, app installation and all that.
One could also argue that for anyone living in Apple’s ecosystem, iTunes remains an essential component — especially if you want to listen to music and/or watch videos on your PC. iTunes is also the most effective way to do a full backup and restore of any of the aforementioned devices.
So why does it suck so much? Seriously, iTunes has devolved into a seriously user-hostile piece of software. (The Windows version, anyway; I can’t comment on its Mac counterpart, simply because I don’t have access to it.) Menus have gone missing, annoying sounds have been introduced — one almost wonders if Apple is intent on punishing Windows users.
Whatever the case, iTunes can be fixed — or at least improved. Here are five settings you should change immediately for a better user experience.
1. Turn off iTunes’ annoying ‘action’ sound
I don’t know when this started, or why, but after installing iTunes on a new PC, I noticed that every time I clicked anything store-related, iTunes made an annoying “action” sound. Click the App Store: vwip! Click a TV episode: vwip!
It’s not just a pointless sound effect, but also an annoying one. Alas, there’s nothing in iTunes’ Preferences menus that lets you disable it.
Instead, you need to head to Windows’ own system-sounds menu, which you can access via the Control Panel or Windows Search (type “sounds” and then click Change system sounds).
 Enlarge Image
Here’s the hidden setting for iTunes’ annoying “action” sound.
Screenshot by Rick Broida/CNET
In the Program Events section, scroll down until you see iTunes. Click Page Load Complete, then the Sounds pull-down menu. Choose None, then click OK to exit. Now iTunes will stay most silent, as it should.
2. Restore the Menu Bar
The Menu Bar is a software staple, providing simple, at-a-glance access to features and options. Apple’s decision to banish it from iTunes is as puzzling as Microsoft’s decision to remove it from Internet Explorer and, later, Edge.
 Enlarge Image
Welcome back, menus!
Screenshot by Rick Broida/CNET
But ours is not to question why; it’s to make iTunes easier to live with, which means restoring the Menu Bar. To do so, just press Ctrl-B. Presto: File, Edit, View and other menus are back where they belong. And while we’re at it…
3. Restore the Sidebar
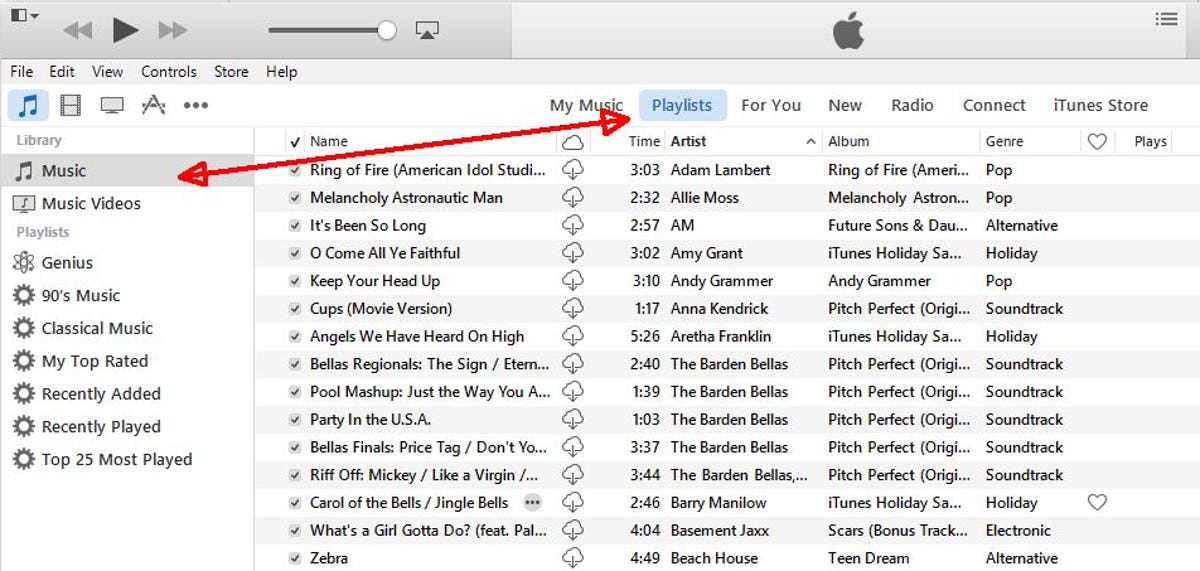
With the removal of the Sidebar, Apple inexplicably and unnecessarily made iTunes more complicated for experienced users of the program. Before, you had quick and easy access to all your media libraries. Now: ugh. The default view, for example, shows large album-cover thumbnails — a terrible way to navigate a music collection.
Screenshot by Rick Broida/CNET
Although you can’t restore the Sidebar quite the same way you can the Menu Bar, you can at least access it. While viewing your music, movies, TV shows or podcasts, click Playlists in the center toolbar near the top. That will give you back your familiar Sidebar view.
4. Customize the toolbar
Wait, you say you can’t find podcasts? Or books, for that matter? Or ringtones? Yeah, that’s because of Apple’s weird toolbar, which by default shows only a handful of options.
 Enlarge Image
Screenshot by Rick Broida/CNET
To remedy that, click the three dots at the right edge of the toolbar, then click Edit. Now check the box next to any option(s) you want to appear in the toolbar full-time. (Alternately, once you’ve restored the Menu Bar, you can find your way to them via the View menu — but only by mousing over the More option.)
5. Turn off passwords for purchases
 Enlarge Image
Screenshot by Rick Broida/CNET
If you’re the only one who uses your computer, or your kids know better than to buy stuff on iTunes without permission, there’s no need to enter your password every time you, say, buy a new album or rent a movie.
By default, however, iTunes requires a password for every purchase. To disable this feature, head to Preferences (by clicking Edit > Preferences or pressing Ctrl-,) and then click the Store tab. Click the Purchases pull-down menu and choose Never Require. Then click OK and you’re done.
OK, your turn! Which iTunes settings would you recommend changing?