Google Docs is packed with powerful tools. Here are 10 that will help you get more out of Google’s free word-processing app.
Talk instead of type
For times when you’d rather use your voice than your fingertips to type, give Google Docs’ voice typing tool a try.
From the top of an open document, go to Tools > Voice typing. A small window with a large microphone icon pops up along the right edge of Chrome that you can click to toggle voice typing on and off. Voice typing is available only in the Chrome browser.
It’s an acquired taste, but you can also use voice typing to edit and format text in Google Docs.
Clear formatting
When you paste a block of text into a Google Doc, its font and font size will likely differ from the rest of your document. To make it conform, highlight the text and do one of three things:
- Right-click the highlighted text and choose Clear formatting.
- Go to Format > Clear formatting.
- Click Normal text from the pull-down menu below the Format and Tools menu options.
Add more fonts
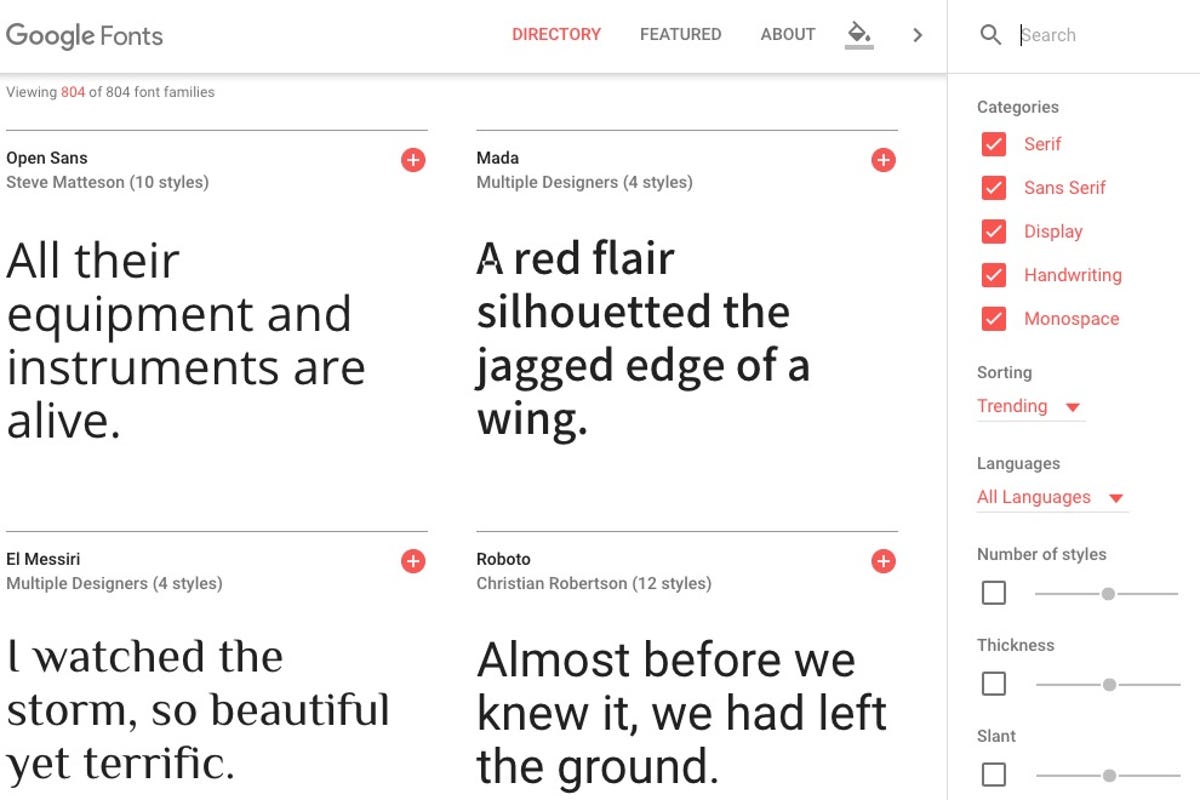
From the font pull-down menu at the top of your document, choose More fonts to add new fonts to this menu. There are hundreds you can choose from:

 Enlarge Image
Screenshot by Matt Elliott/CNET
To get a better sense of how the different fonts look, check out Google Fonts where you can view sample sentences of each font. You can also click into each sample sentence and change it to your own wording. When you find a font you like, just search for its name from the fonts pull-down menu in Google Docs and add it to your list.
Suggestion mode
Stop, collaborate and listen: when you’re working on a shared document, you can change the edit mode so that Google Docs tracks changes like Microsoft Word. To show your edits and allow your collaborators to accept or reject them, select the pencil button in the upper-right corner of your document and click Suggesting. Now, as you edit the document, changes will show up as color-coded suggestions with a comment next to each to show who made the change. Each comment has an Accept and Reject button.
Tag someone in a comment
If you want to draw someone’s attention to a comment you added, you can tag them. When writing your comment, enter the @ or + sign and choose the person you want to tag. He or she will then get an email to alert them of your comment or question.
Bookmark more, scroll less
For long documents, adding bookmarks means less scrolling. Go to Insert > Bookmark to add a bookmark to your document. A small, blue bookmark icon will be added to the left edge of your document.
More Google Docs news and tips
- 6 new Google Drive features you need to know about
- Office, iWork, Drive, and OpenOffice: Which office apps are right for you?
- OneDrive, Dropbox, Google Drive and Box: Which cloud storage service is right for you?
You can create a link to a bookmark, which is helpful for long documents because you can create a quick table of contents at the top of your document to jump to your various bookmarks. Right-click at the top of your document (or any location where a link to a bookmark might be helpful) and click Link. Instead of adding a URL, select one of your bookmarks from the drop-down menu below, enter the link text and click Apply.
You don’t need to use bookmark links, however, for bookmarks to helpful. I use a single bookmark to pick up where I left off the next time I open a Google Doc. To jump to the next bookmark (or, in my case, the only bookmark), hold down the Control and Command keys and hit N and then B. And to move to the previous bookmark, hold down the Control and Command keys and hit P and then B. The keyboard shortcuts are a bit cumbersome, but easier to remember if you think of the keys standing for next bookmark and previous bookmark.
Offline mode
You don’t need an Internet connection to use Google Docs, though you will need to be connected when setting up offline use (along with Chrome).
From the main screen of Google Drive:
- Click the gear icon in the upper-right corner and click Settings.
- Check the box in the Offline section for “Sync Google Docs, Sheets, Slides & Drawings files to this computer so that you can edit offline.”
With offline mode turned on, you’ll be able to view and edit your Docs, Sheets, Slides and Drawings when you are disconnected and the files will sync the next time you connect to the Internet.
Roll your own substitutions
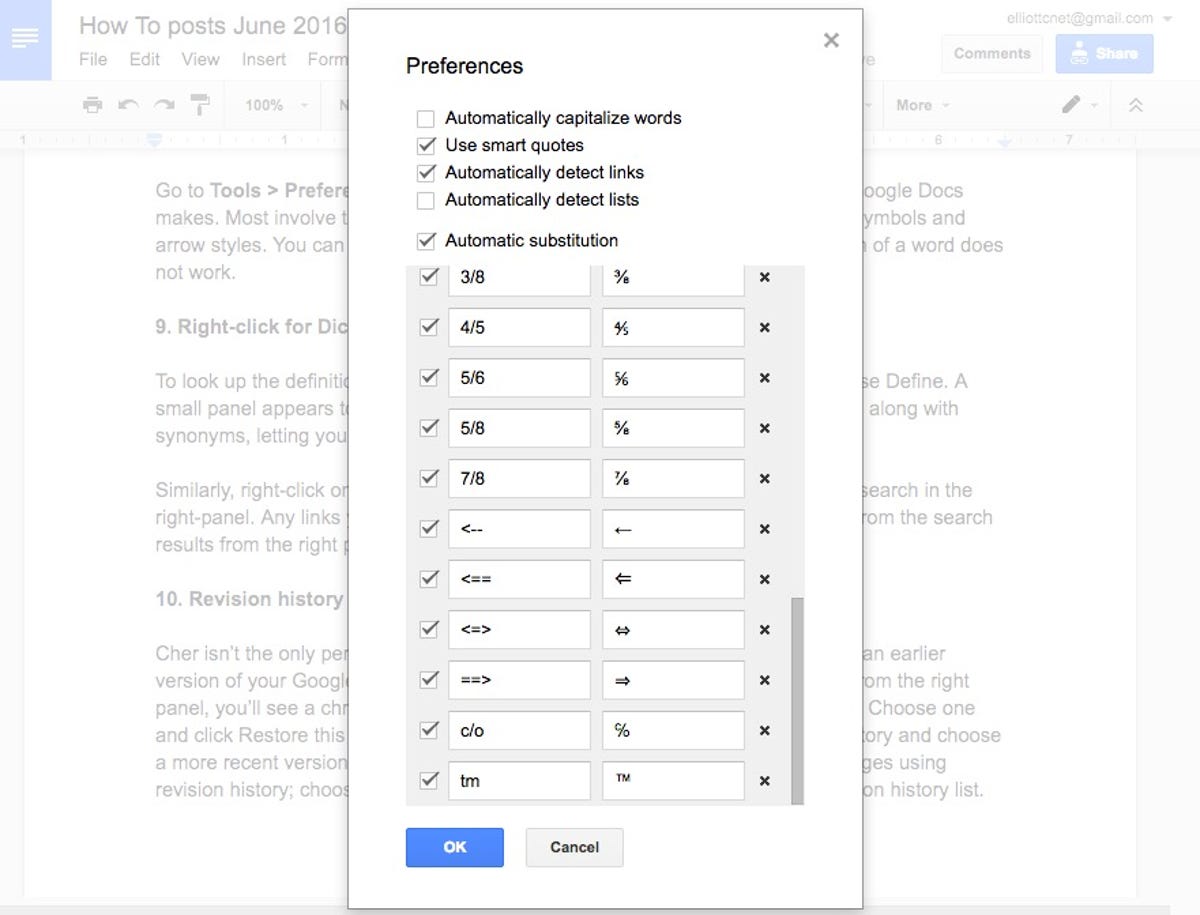
Go to Tools > Preferences and you’ll see a list of automatic substitutions that Google Docs makes. Most involve the style in which fractions are displayed along with a few symbols and arrow styles. You can add your own, but substitutions based on the capitalization of a word does not work.


Screenshot by Matt Elliott/CNET
Right-click for research
To look up the definition of a word on the quick, right-click on the word and choose Define. A small panel appears to the right of your document with the definition of the word, along with synonyms, letting you get information without leaving Google Docs.
Similarly, right-click on a word and choose Research to perform a quick Google search in the right-panel. Any links you click will open in a new tab, but you can drag images from the search results from the right panel directly into your document.
Revision history
Cher isn’t the only person who occasionally wishes to turn back time. If you’d like to return to an earlier version of your Google Doc, you can by going to File > See revision history. From the right panel, you’ll see a chronological list of time-stamped versions of your document. Choose one and click Restore this revision to open it.
You can always go back to revision history and choose a more recent version to return to your latest edits. There is no way to lose changes using revision history; choosing an earlier version just moves it to the top of your revision history list.


