
Related Articles


After I updated my iPhone 6S to iOS 10 it felt like it was on fire for the first few hours, and not in the good way. My iPhone got hotter than it ever has while performance slowed to a crawl. The situation improved by the end of iOS 10’s launch day; my iPhone 6S was back operating at its normal temperature and usual pace.
I believe the initial heat-up and slowdown were due in large part to the Photos app indexing my large photo library in the background while I flitted about using iOS 10. After that task was complete, my iPhone 6S felt roughly the same as it did on iOS 9, but I feel my battery is draining faster, and I’m still seeing the occasional hiccup with apps loading.
If your iOS device is feeling sluggish, there are a few things you can do to help improve performance a bit.
1. Clear some space
If your device’s hard drive is near capacity, reducing the amount of data stored on it could result in a speed boost. To see how much free space you have, go to Settings > General > Storage & iCloud Usage and select Manage Storage under the Storage section (as opposed to iCloud). You will see how much available and used space you have above a list of your apps and the amount of space each occupies. Delete any apps you no longer use and then go through your photos and videos and delete or offload any nonessentials to your computer or the cloud.
 Enlarge Image
Screenshot by Matt Elliott/CNET
2. Kill automatic downloads
As with previous iterations, iOS 10 runs processes in the background to make your life easier. Apps update themselves in the background, for example, which saves you from having to stare at an ever-increasing number in the badge alert on your App Store icon.
Updating apps in the background, however, is a process that occupies your device’s CPU (not to mention battery). You can disable this feature and update your apps manually via the App Store app.
To do so, go to Settings > iTunes & App Store and tap the toggle switch to turn off Updates in the Automatic Downloads section. (The other three options here — Music, Apps and Books & Audiobooks — are for sharing downloads among your iOS devices. When enabled, any new purchases that you make in the iTunes Store, App Store or iBooks Store automatically sync across your devices.)
 Enlarge Image
Screenshot by Matt Elliott/CNET
3. Kill background app refresh
In addition to updating when you are otherwise occupied, apps also refresh their content in the background. For example, your Facebook or Twitter feed will update without you manually updating when you open the app. Helpful, to be sure, but it occupies CPU cycles. To turn it off, go to Settings > General > Background App Refresh and tap the toggle switch off.
Alternatively, you can leave Background App Refresh enabled at the top and pursue an a la carte background app refresh method, making your selection app by app below.
 Enlarge Image
Screenshot by Matt Elliott/CNET
4. Reduce transparency and motion effects
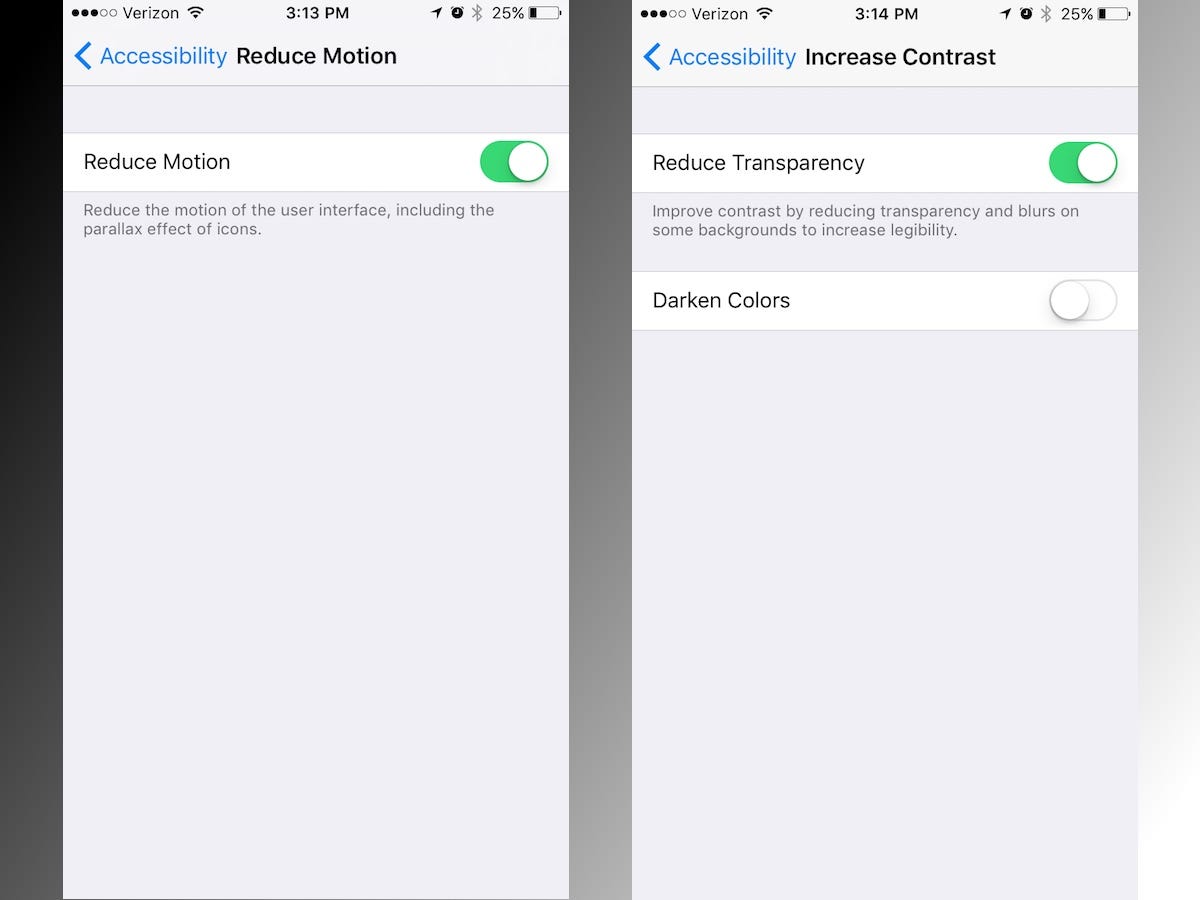
Apple uses a number of effects to give iOS a sense of depth as you tilt your phone or open and close apps. These motion effects generally improve your experience, but not if they result in choppy animations. To disable, go to Settings > General > Accessibility and tap the toggle switch to turn on Reduce Motion.
Next, head back to the Accessibility screen, tap the line above Reduce Motion titled Increase Contrast and tap the toggle switch to turn on Reduce Transparency. This setting reduces the transparency and blur effects, ostensibly to increase legibility, but it can also serve to speed up performance because it’s one fewer graphics task for your device’s processor to handle.
Keep in mind that reducing these effects may kill off some fun effects you might otherwise enjoy. The reduce motion setting, for example, means no sending or receiving bubble effects in the new Messages app.
 Enlarge Image
Screenshot by Matt Elliott/CNET
5. Check which apps are checking your location
Location services affect battery life more than performance, but if your iOS device is draining its battery at a faster clip with iOS 10, it’s time to cut down on the number of apps using your device’s GPS to request your location. Go to Settings > Privacy > Location Services. You probably don’t want to disable location services entirely if you want to use Maps and other GPS-dependent apps; below the nuclear option you can disable location services for individual apps. Some apps such as Google and some weather apps request to always allow location access, but you can limit them to access your location only While Using the app.
 Enlarge Image
Screenshot by Matt Elliott/CNET
6. Reboot
When all else fails, you can always try restarting your device. If your iOS device has been on constantly for days or weeks at a time, give it a break and power it off and back on. Sometimes a simple reboot will let it regain its stride.
For more, check out our complete guide to iOS 10.

Now playing:
Watch this:
iOS 10: 7 settings to change when you upgrade
2:32