
Related Articles


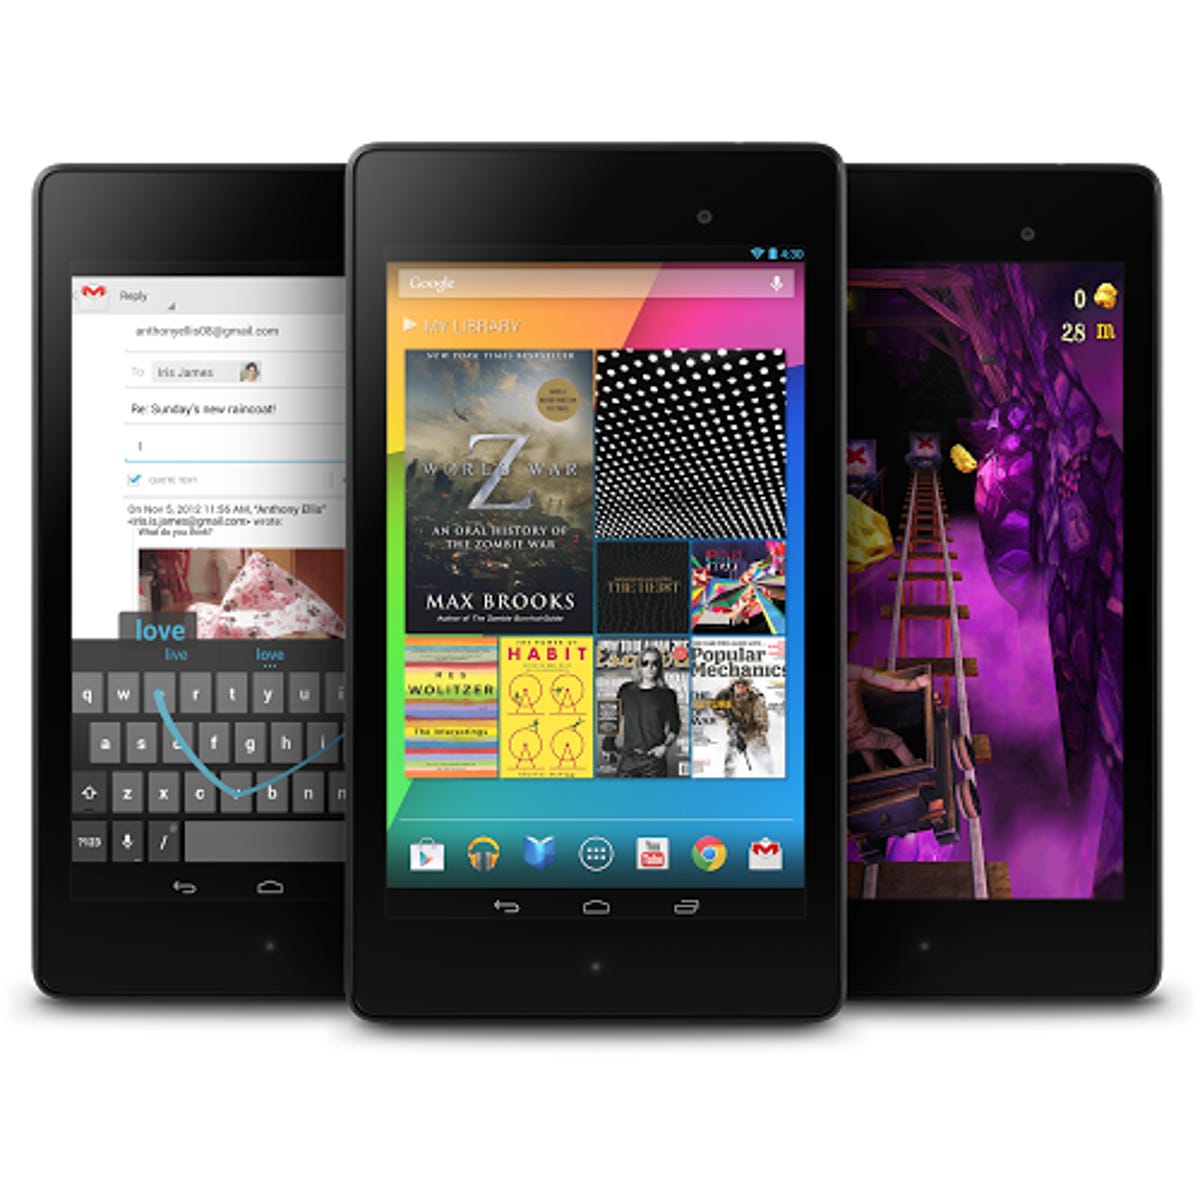
One good thing about the tablet wars is that there can be more than one winner. Even for a longtime iPad user such as myself, there’s a lot to like about the Nexus 7.
You’ll like the device even more after you’ve tweaked a few of its default settings. Here are a handful of customizations guaranteed to make your use of the Nexus 7 more enjoyable.
Set or change your default apps When you choose a file on your Android tablet, you’re prompted to select an app to open it in. To set your selected app as the default for that type of file, press Always after you make your app selection, or press “Just once” to have the app-selection pop-up appear each time you open that type of file.
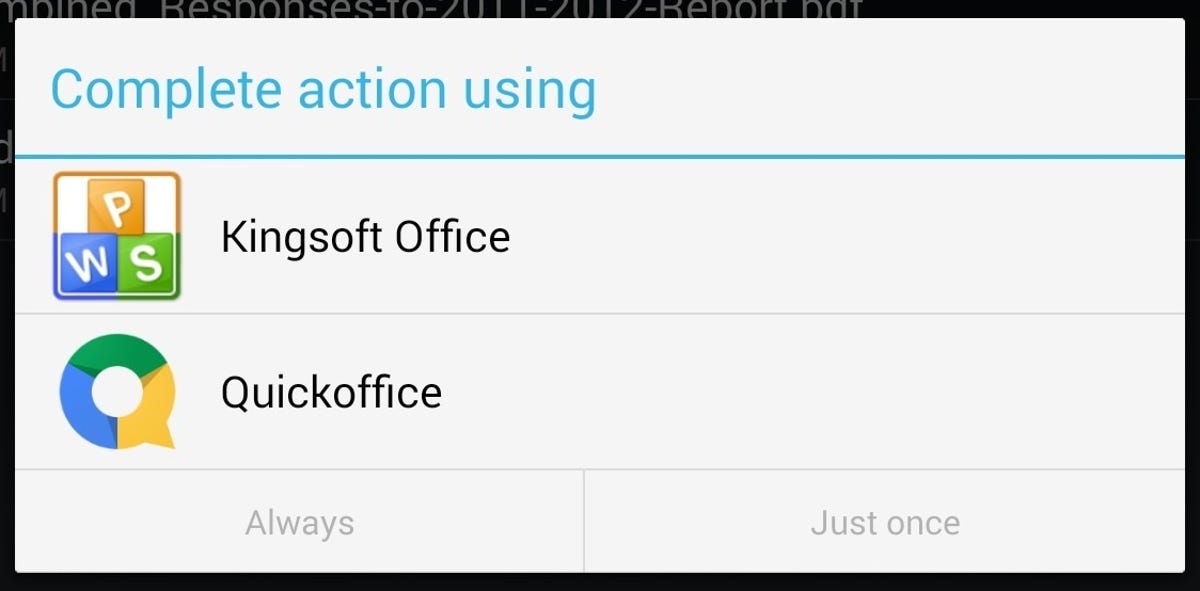
Screenshot by Dennis O’Reilly/CNET
To clear the default app for a specific file type, open Settings, press Apps under Device, select the app you don’t want to open by default, and press “Clear defaults” under Launch by Default.
To uninstall an app, open the Apps window on the Home screen and choose the Apps tab. Press and hold the app’s icon, drag the icon to the Uninstall icon that appears at the top of the window, and press OK. Note that the Uninstall icon is visible only for apps that you can uninstall from the device.
You can also uninstall an app via Settings: press Apps under Device, choose the app you want to uninstall, and press the Uninstall button.
Force-close a running app Some apps just don’t know when to quit. Applying updates or moving to the next level in a game may require that you restart the app, which could entail forcing it to close.
To shut down an app manually, open Settings, press Apps under Device, select the app you want to close, press the “Force stop” button, and choose OK.
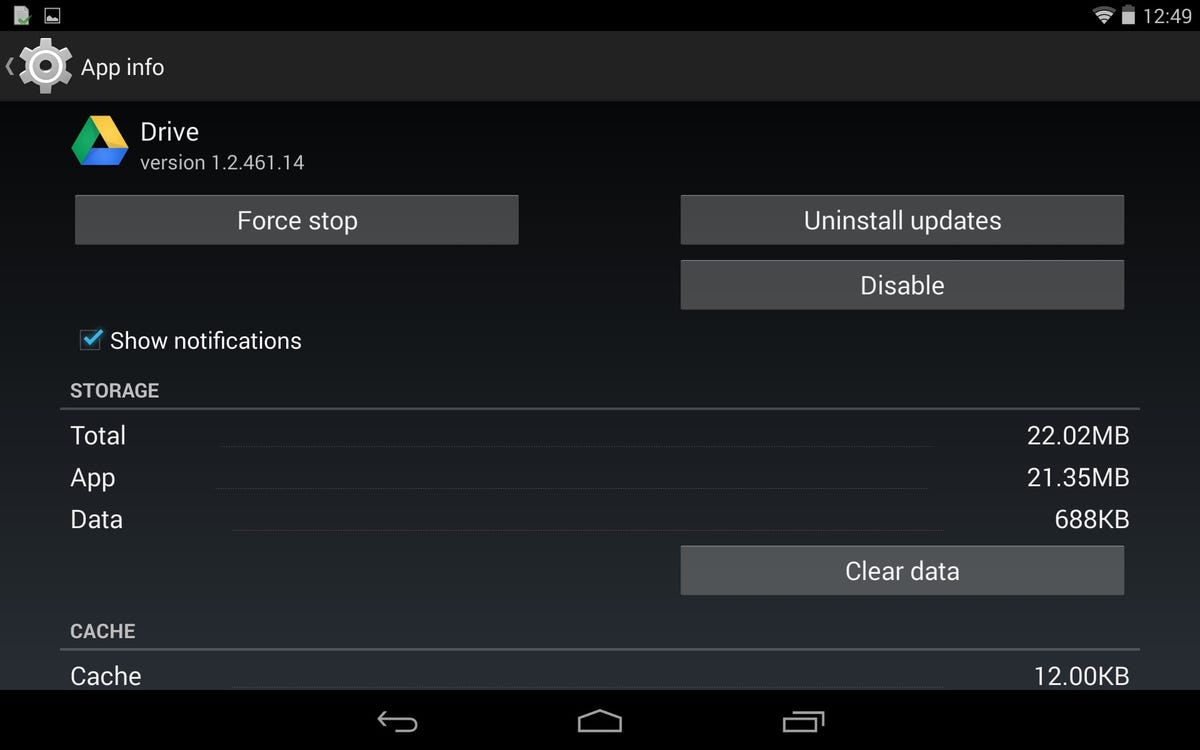
Screenshot by Dennis O’Reilly/CNET
Disable auto-correction As you type, the Nexus 7 checks your spelling and presents word suggestions. Either choose one of the entries or allow the highlighted word to replace the word you’re typing by entering a space, punctuation mark, or return.
If you’d rather do without the typing suggestions, open Settings, choose “Language & input” under Personal, press the Quick Settings icon to the right of the entry for your keyboard in the Keyboard & Input Methods list, choose “Auto-correction” under Text Correction, and set the Auto-correction option to Off.
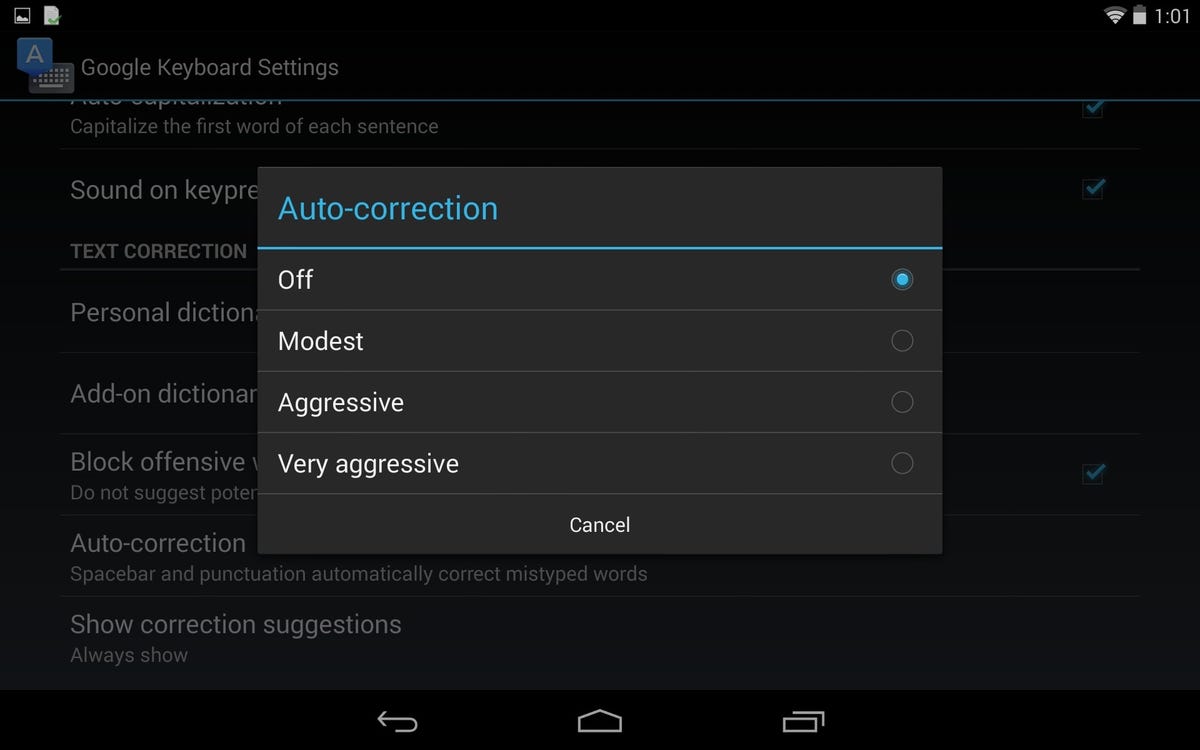
Screenshot by Dennis O’Reilly/CNET
The default setting is Modest; in addition to disabling auto-correction, you can change the auto-correction setting to Aggressive or Very Aggressive.
To train your device to exclude suggestions, press the Delete key to banish the suggestion and revert to the word you typed.
Manage notifications The notifications that appear at the top of the Nexus 7 screen include calendar entries, alarms, received e-mails, and other events. Swipe down from the top of screen to view your notifications, and swipe up to close the notification window.
To dismiss a notification, swipe sideways to remove it from the list, or press the icon in the top-right corner of the window to dismiss all listed notifications. To open a notification, press it to start the app it’s associated with. The notification will be removed from the list automatically.
Bonus tip: Sliding down from the top-right corner of the screen displays the Quick Settings window, which has shortcuts to your Settings, wireless and airplane-mode options, brightness controls, and other settings.
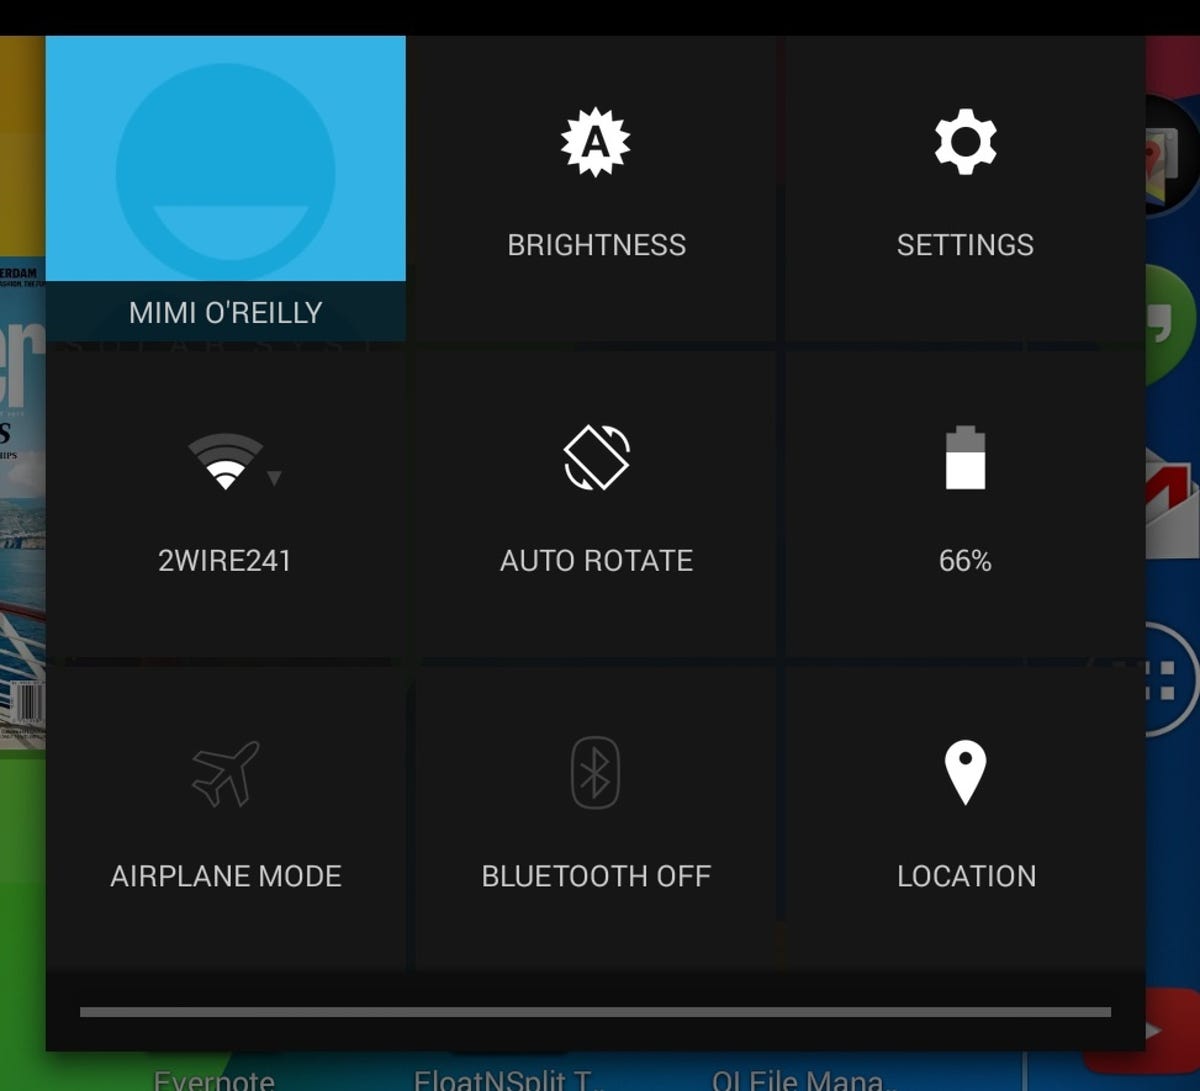
Screenshot by Dennis O’Reilly/CNET
Save Google Maps for offline viewing If you open Google Maps to the same area repeatedly, you can save the map locally so you can view it without having to open a network connection. This comes in handy when no network is available and also saves you data-transfer charges when you’re not connecting over a Wi-Fi link.
Related stories
- Heads up Apple, Android to make big gains in 2014, IDC predicts
- iPad Mini’s Retina Display finishes last in small-screen review
- Google rolls out teacher-friendly tablet
- HP quietly launches new Android tablets
Unfortunately, Google removed the offline-viewing option for its maps in the most recent version 4.4 of Android. In the new release, the only way to save a map for offline viewing is to add it to your cache. Alternatively, you can revert to an earlier version of Google Maps for Android.
In older versions of Android, you can save maps for offline viewing by opening the map you want to save in Google Maps, pressing the menu key, choosing Make Available Offline, and selecting the map area you want to save. Offline maps can be as large as 100MB.
The workaround for Android 4.4 is to select the map area, enter OK Maps in the search box, and pressing Search. The map will be stored in your cache.
Add a contact shortcut to the home screen If you find yourself accessing the same one or two contacts repeatedly, you can save time by adding a shortcut to the contacts on the home screen. To do so, find an open space on your home screen, then open the Widgets window, press and hold the Contact entry, scroll through your contact list, and choose the entry for the person you want to reach with a single press.
Prevent apps from adding their icon to the home screen If you find your home screen getting cluttered with app icons, you can either combine the icons into folders or tell the device not to place app icons there as part of the programs’ installation.
To install apps without having their icons added by default to the home screen, open the Google Play store, select Settings, and uncheck “Auto-add widgets.”

Now playing:
Watch this:
New Nexus 7 brings on HD
1:46
