Microsoft has finally integrated Skype into Windows. The voice and video messaging service now comes preinstalled in Windows 10 across three different native apps: Skype Video, Messaging and Phone.
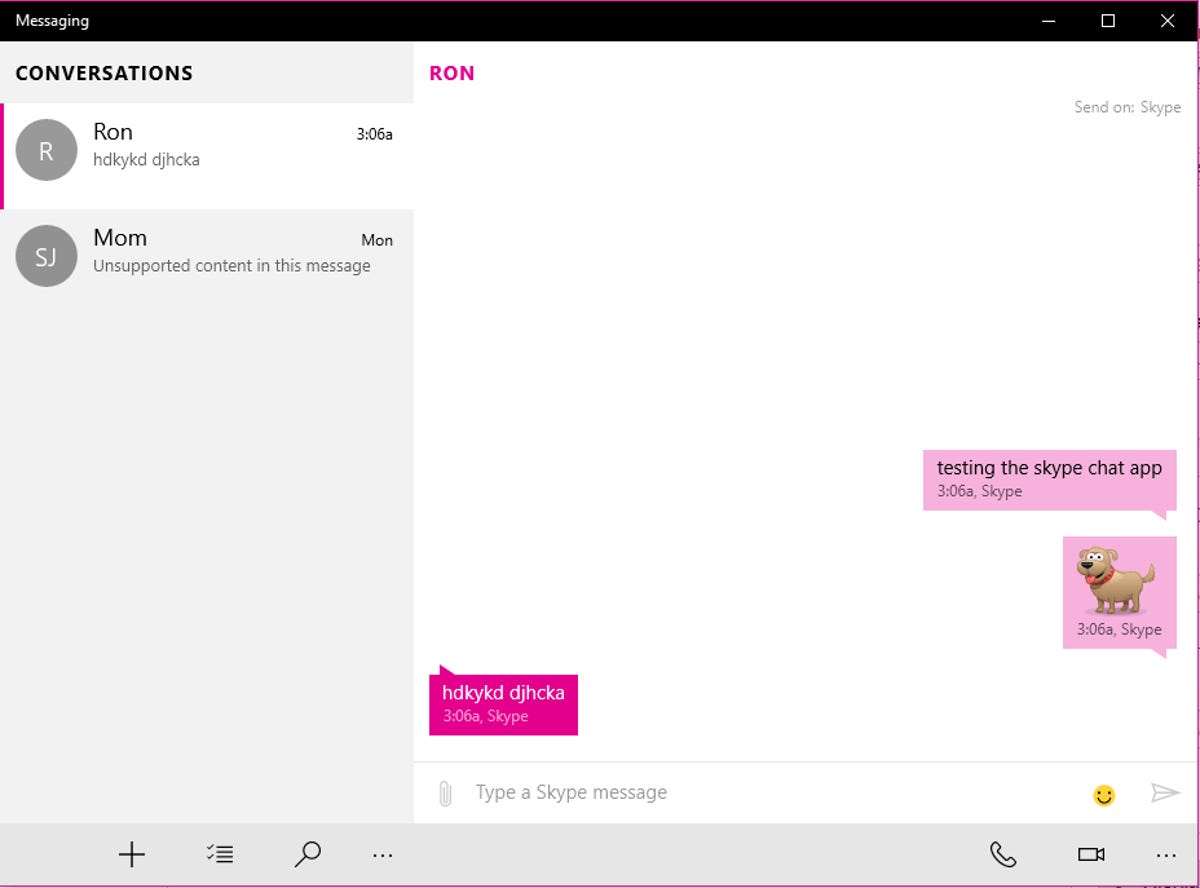
What does this mean for you, aside from the fact that you no longer need to download Skype’s desktop client to video chat with your mom? Well, if you already use Skype as your primary over-the-top messaging app (you probably don’t), you can now send and receive text messages from the new Messaging app on your desktop — like iMessage, but accessible over multiple platforms. The new Skype apps are also fully integrated with Windows 10’s Action Center notifications.
Set up Skype


The new Skype Messaging app.
Sarah Jacobsson Purewal/CNET
Setting up Skype in Windows 10 is pretty easy — in fact, most of the work is done for you. Microsoft assumes you’ll want to use your Microsoft account to log into Skype, so when you first open one of the Skype apps — either Skype Video, Messaging or Phone — you’ll see your Microsoft account email address already logged in.
If you already have an existing Skype account, you can connect that account to your Microsoft account.
Once you’ve combined your Skype accounts, Windows 10 will walk you through a super-quick setup where you will be asked if you want to scan your address book for existing Skype contacts and if you want to add a phone number so contacts can find you. You can choose to do both of these things later, and you’ll be taken straight to the Skype app.
Get rid of Skype
If you’re not a Skype user — or if you prefer to use the original Skype desktop client — you may find this new Skype integration annoying.


Sarah Jacobsson Purewal/CNET
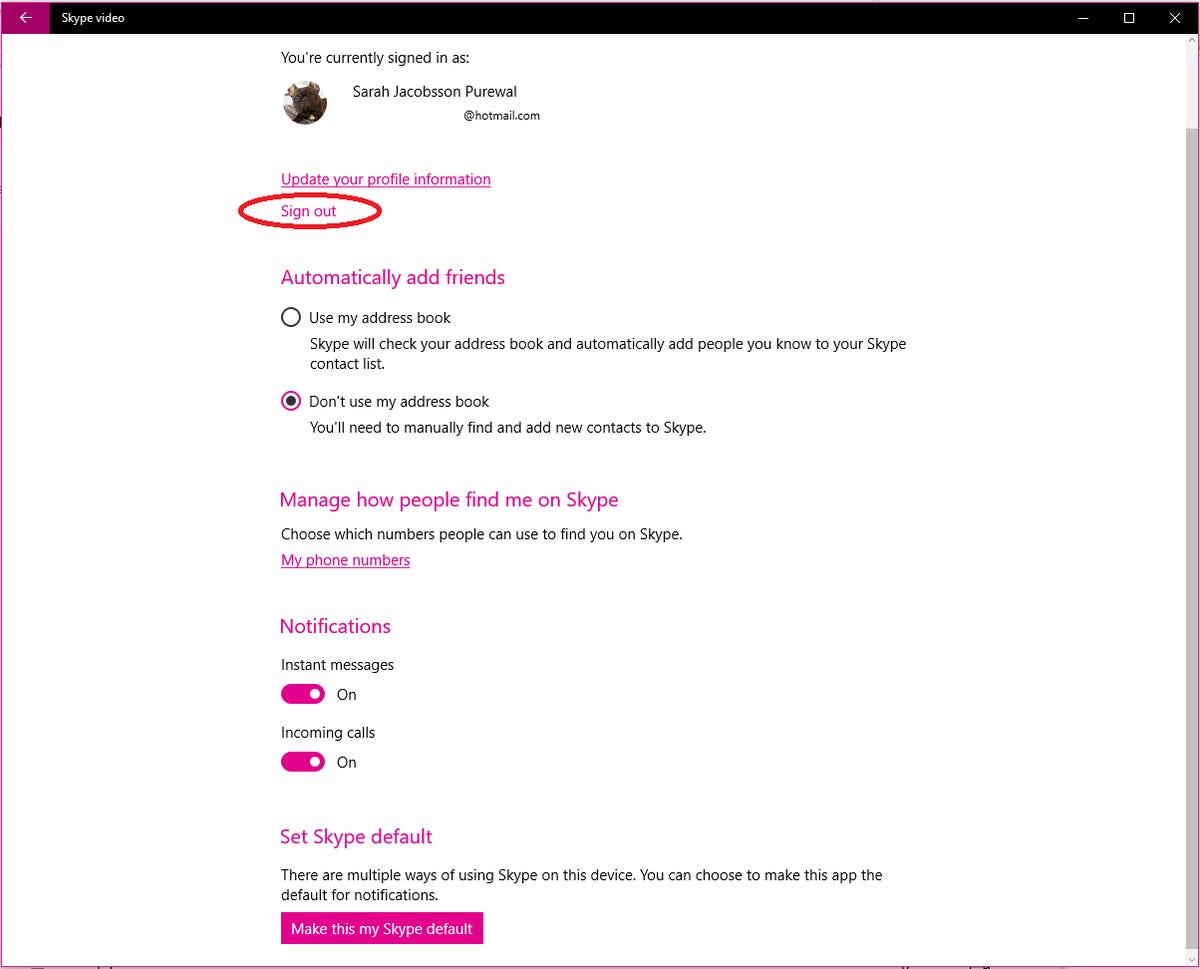
To sign out of Skype on Windows 10, open up Skype Video and click the menu (three dots) icon and open Settings. Under Account, click Sign out.


Sarah Jacobsson Purewal/CNET
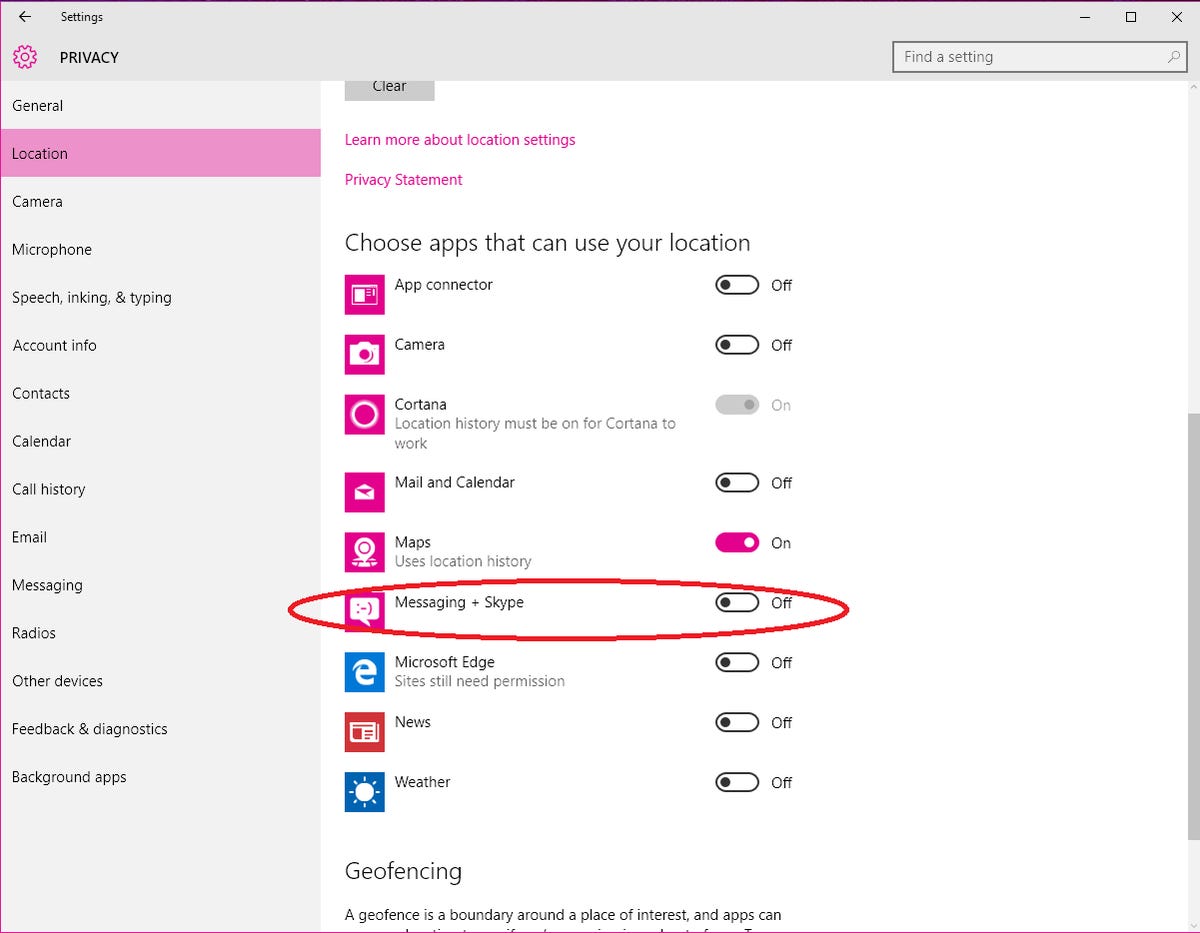
To keep Skype from poking its nose into your personal information, such as your messages, call history, and contact list, open the Settings menu and go to Privacy. In the Privacy window, click each tab that Skype uses — Location, Camera, Microphone, Contacts, Call history, Messaging and Background apps — and turn off Messaging + Skype access in each section.
To delete Skype completely, check out our article on how to delete default Windows 10 apps. You’ll need to perform the PowerShell command for each of the following applications:
Skype Video & Messaging: Get-AppxPackage *Messaging* | Remove-AppxPackage
Phone: Get-AppxPackage *CommsPhone* |Remove-AppxPackage
Get Skype: Get-AppxPackage *skypeapp* | Remove-AppxPackage


