
Related Articles


Andrew Hoyle/CNET
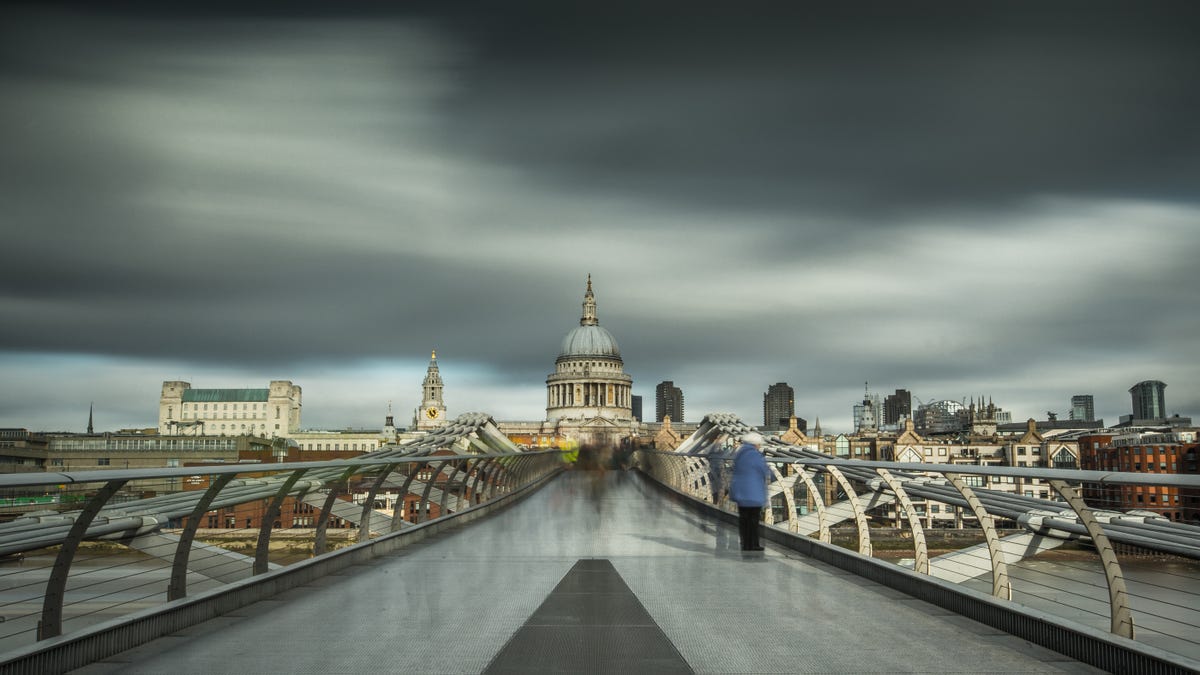
Fast shutter speeds are great at freezing action in place, but slow the speed right down and watch as movement in a scene turns to smooth, abstract forms. Long-exposure photography is a great technique to play with and lends itself particularly to clouds moving across landscapes, waves crashing onto rocky shores or busy nighttime city streets.
It doesn’t even require expensive kit or hours of training to get started. Read through this guide to find out how you can create your own slow-shutter masterpieces.
The minimum kit you’ll need
- A camera that offers full manual control over shutter speed, aperture and ISO speeds.
- A sturdy tripod.
Andrew Hoyle/CNET
Handy extras
- A remote shutter release allows you to take a photo without touching the camera, which can help reduce blur. If you don’t have one, then setting the self timer for 2 seconds will achieve the same result.
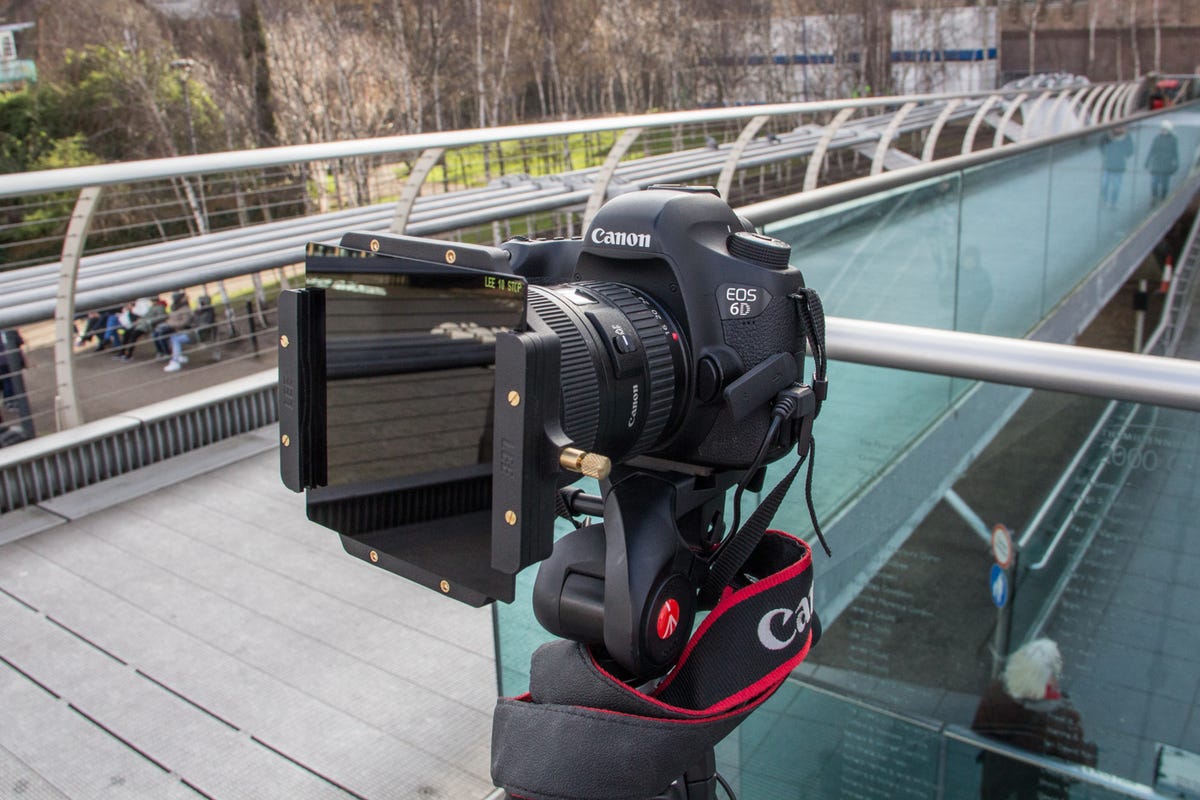
- Neutral density filters, such as the Big Stopper by Lee Filters, are crucial if you want to take long exposures in the middle of the day. They act like sunglasses for the lens, reducing the amount of light coming into the camera, letting you expose a photo for over a minute without it looking completely white and washed out.

Andrew Hoyle/CNET
Find your location
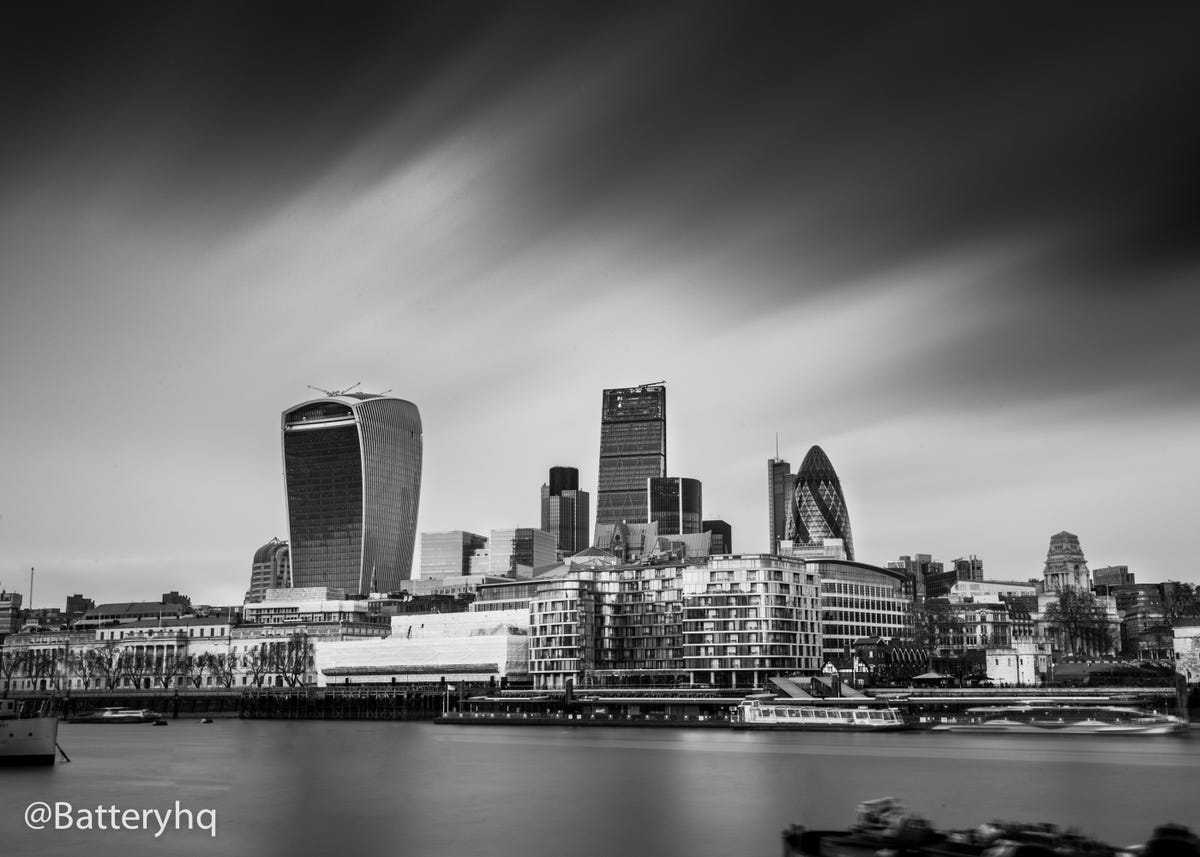
Long-exposure photos have the most impact when they combine both moving and still subjects, so think about where you can combine those. Clouds moving over buildings and cityscapes provide brilliant fodder for dramatic shots, so head into town, get in among the buildings and point your camera upward. Clouds streaking over wide landscapes also look particularly dramatic.
Andrew Hoyle/CNET
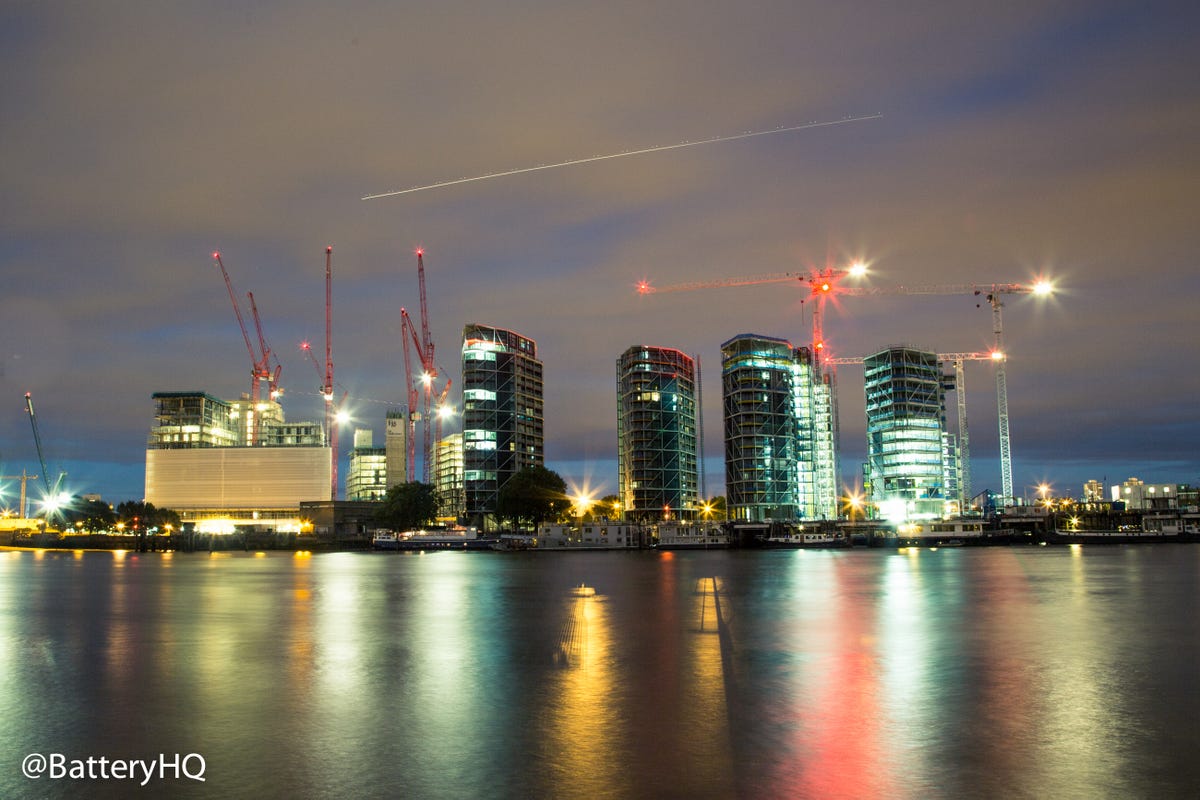
City streets at night are fantastic locations to experiment with, as car headlights will turn into long, winding streaks of light, twisting through the streets, when captured with slow shutter speeds. Position yourself near a busy junction — safely away from traffic, of course — and see what you can catch.
Set up your equipment
Set up your tripod so it’s nice and stable. Make sure it’s positioned so it can’t be knocked by passersby, and not on a surface that is likely to shake or vibrate due to traffic or wind. Keep in mind that even the slightest wobble — when exaggerated over a minute — can result in a very blurry shot. A strong wind can cause a lot of camera shake, so position yourself as a barrier to reduce the amount of wind destroying your lovely photos.
Frame your shot and set your lens to manual focus — particularly if you’re shooting in the dark. Many cameras allow you to zoom into the scene using the LCD display, which is handy for making sure you’ve got the best focus on your subject. If you’re using dark neutral-density filters, slot these in place after you’ve set up your scene.
Andrew Hoyle/CNET
Choose the right settings
The main setting you need to change to capture long exposures is the shutter speed. The slower the shutter speed, the longer the sensor is exposed to light, resulting in more movement being captured. How long you choose will depend on how fast your subjects are travelling and how much ambient light there is.
More photography tips
- CNET’s ultimate travel photography kit guide
- CNET’s top tips on getting stunning travel photos
- Best digital cameras of 2015
If you’re shooting car headlight trails at night, for example, start out with a shutter speed of 2 to 3 seconds — as the cars are moving fast, you won’t need to keep the shutter open long to capture the movement. Clouds tend to move more slowly across the sky, so shutter speeds of 20 seconds or more may be necessary here.
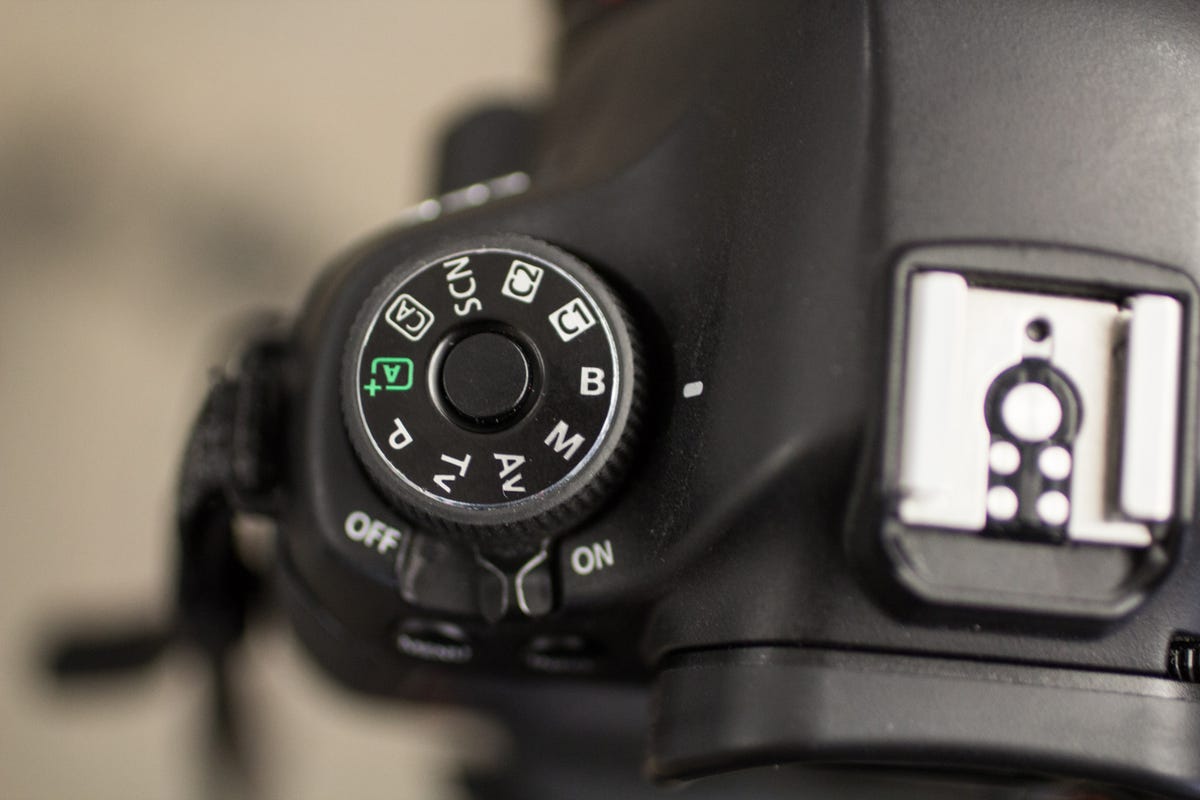
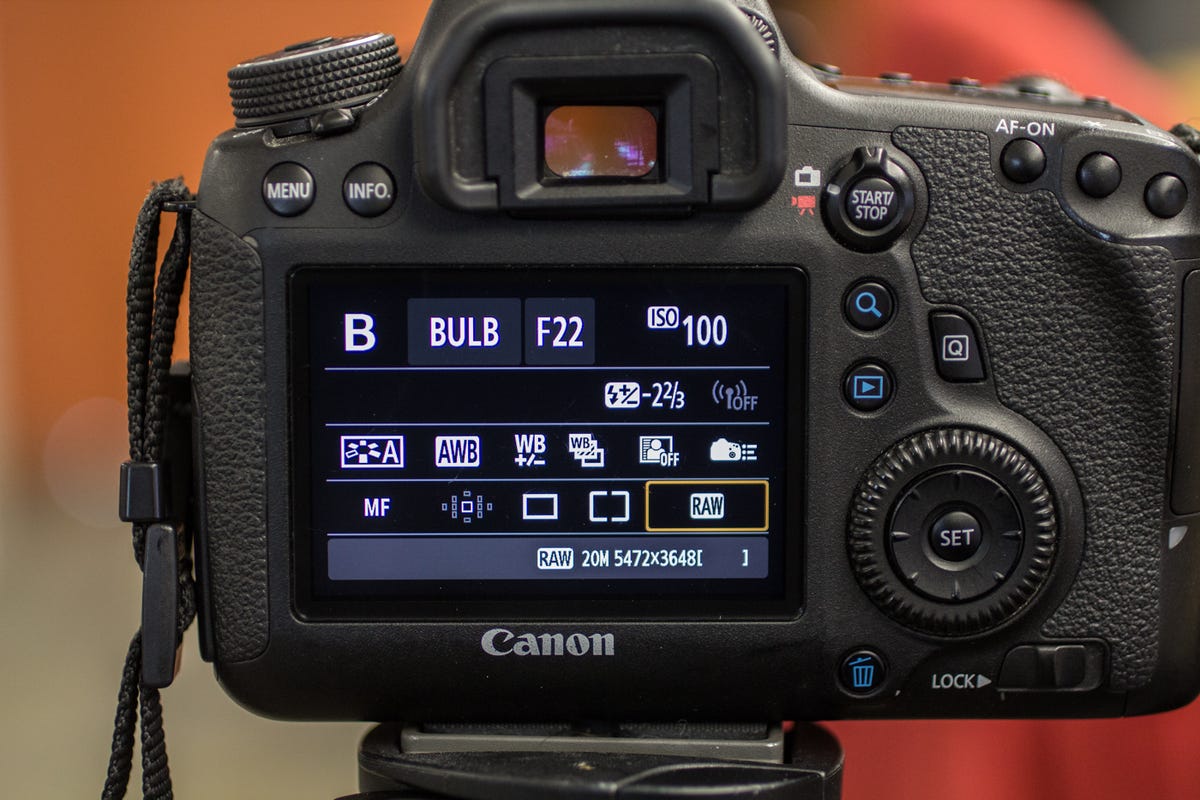
If you’re shooting for longer than 30 seconds then you’ll need to switch to bulb mode, which allows you to keep the shutter open for as long as you keep your finger held down on the shutter. This is typically only a feature you’ll find on dSLRs and you’ll definitely need to use a remote shutter release — holding your finger on the camera for that length of time will shake it and cause blur in the final image.
Andrew Hoyle/CNET
Using a narrow aperture — f/12-f/22 — will restrict the amount of light allowed in so it’s a good way of shooting long exposures in low, but not quite black light. Keep your ISO speed at the minimum your camera will allow — typically 100 or 200 — as this will help keep image noise to a minimum.
If your camera allows it — and most do — shoot in raw format. Not only do raw images capture greater detail in the dark and light areas of an image, they allow you to select the white balance after having taken the shot.
Take your shot
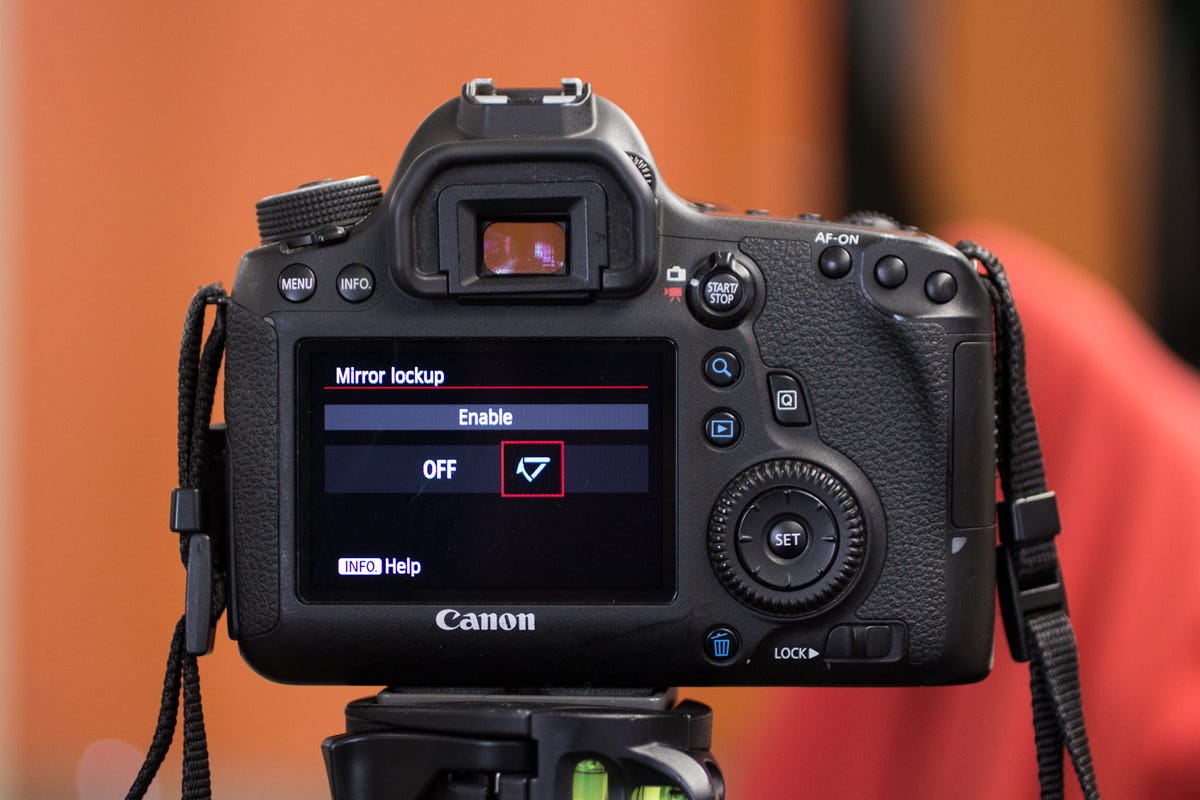
If your dSLR has a mirror lockup function, use it. When taking a photo, a dSLR’s mirror has to physically flip up out of the way to allow light to strike the sensor instead of being bounced into the viewfinder. This movement, although tiny, is enough to add a small amount of blur to long-exposure photos. Using mirror lockup moves the mirror out of the way before the photo starts to be captured.
Andrew Hoyle/CNET
If you have a remote shutter release, use that to avoid shaking the camera. Alternatively, set the self timer to 2 seconds so you don’t have to touch the camera when the shot is taken. Always review your shots on the LCD display to ensure they’re exposed sufficiently and zoom in to check that you’ve focused properly.
Process your shots
Processing isn’t a critical step, but it’s certainly worth experimenting with. Although you should always make sure your shot is properly exposed and composed in camera — no amount of editing can rescue a badly composed shot — the sometimes abstract results from long-exposure photos often lend themselves to a bit of tinkering with in post.
Nighttime shots, particularly car headlights streaking through dark city streets, are naturally high-contrast so often work well in black and white. There are no strict rules to processing, so it’s always good to spend some time having a play with colour balance sliders, contrast and even cross-processing.
Andrew Hoyle/CNET
