
Related Articles


Putting your MacBook into its sleep state is a convenient and useful option when you need to step away for a moment. Provided you have an account password set up, sleep lets you lock your MacBook without shutting it down so you can quickly resume your labors upon your return.
There are a number of ways — seven, by my count — to put your MacBook to sleep. The first five require you to set up a log-in password, while the last two let you lock your Mac without needing a log-in password, which is convenient if you want to be able to close your Mac’s lid, for instance, without needing to enter a password when you open it back up.
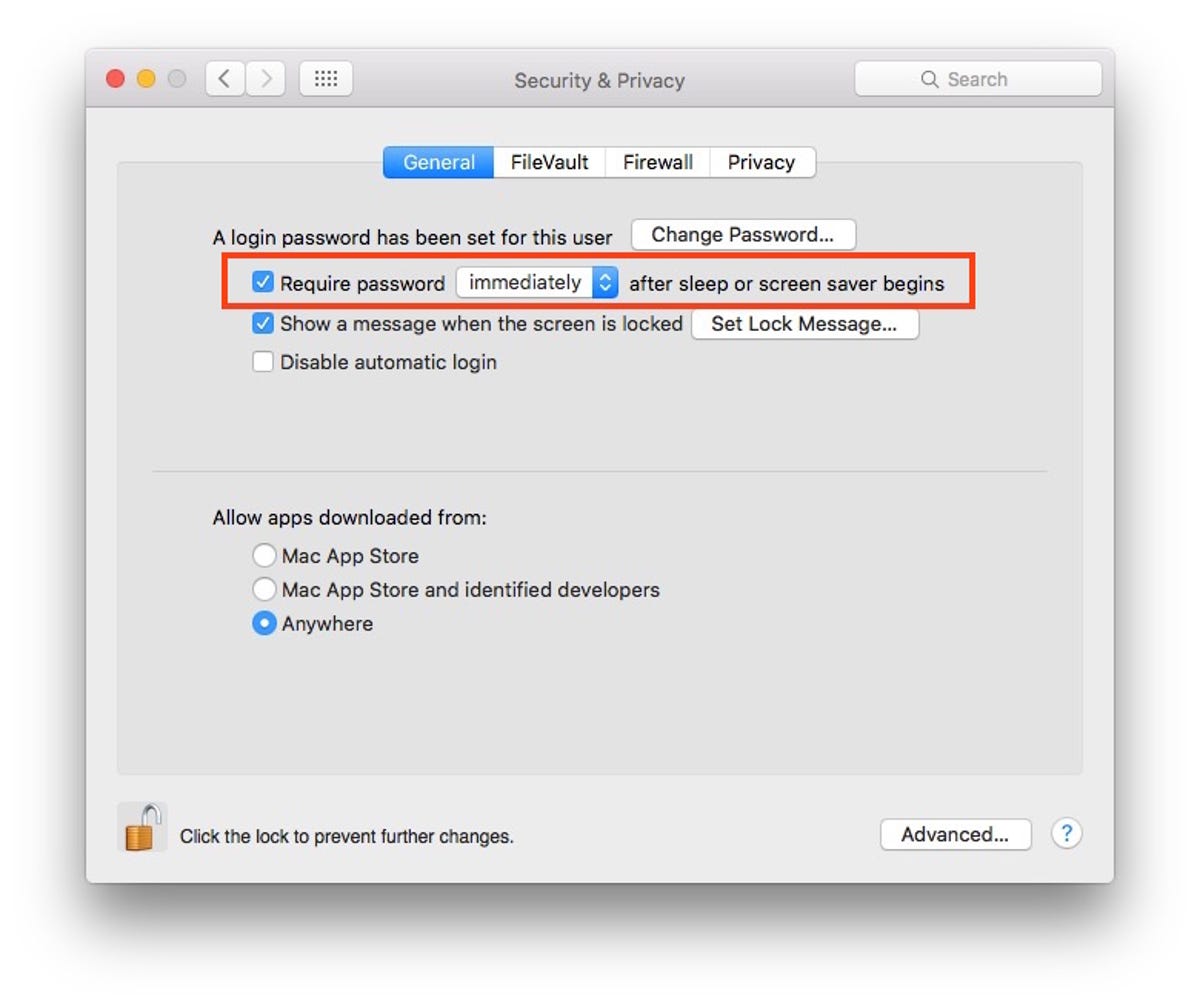
Before we get started, let’s first go over how to enable a log-in password. Go to System Preferences > Security & Privacy and check the box for Require Password after sleep or screen saver begins. In the drop-down menu, you can set timing of the password, from immediately to up to 8 hours.
 Enlarge Image
Screenshot by Matt Elliott/CNET
With a password set, the following five methods will lock your MacBook:
1. Close the lid
Simple. Just close the lid and when you open it next, you’ll need to enter your password to log back in.
2. Apple icon in menu bar
Also simple. Click the Apple icon in the upper-left corner and choose Sleep.
3. Keyboard shortcut
There are two keyboard shortcuts that effectively lock your Mac:
Use Control-Shift-Power to lock your MacBook. (For older MacBooks with an optical drive, use Control-Shift-Eject.)
Use Command-Option-Power to put your MacBook to sleep. (For older MacBooks with an optical drive, use Command-Option-Eject.)
Both sleep and lock will turn off your display, but sleep conserves more energy by putting the CPU into low-power mode, spinning down the hard drive and stopping background tasks, among other things.
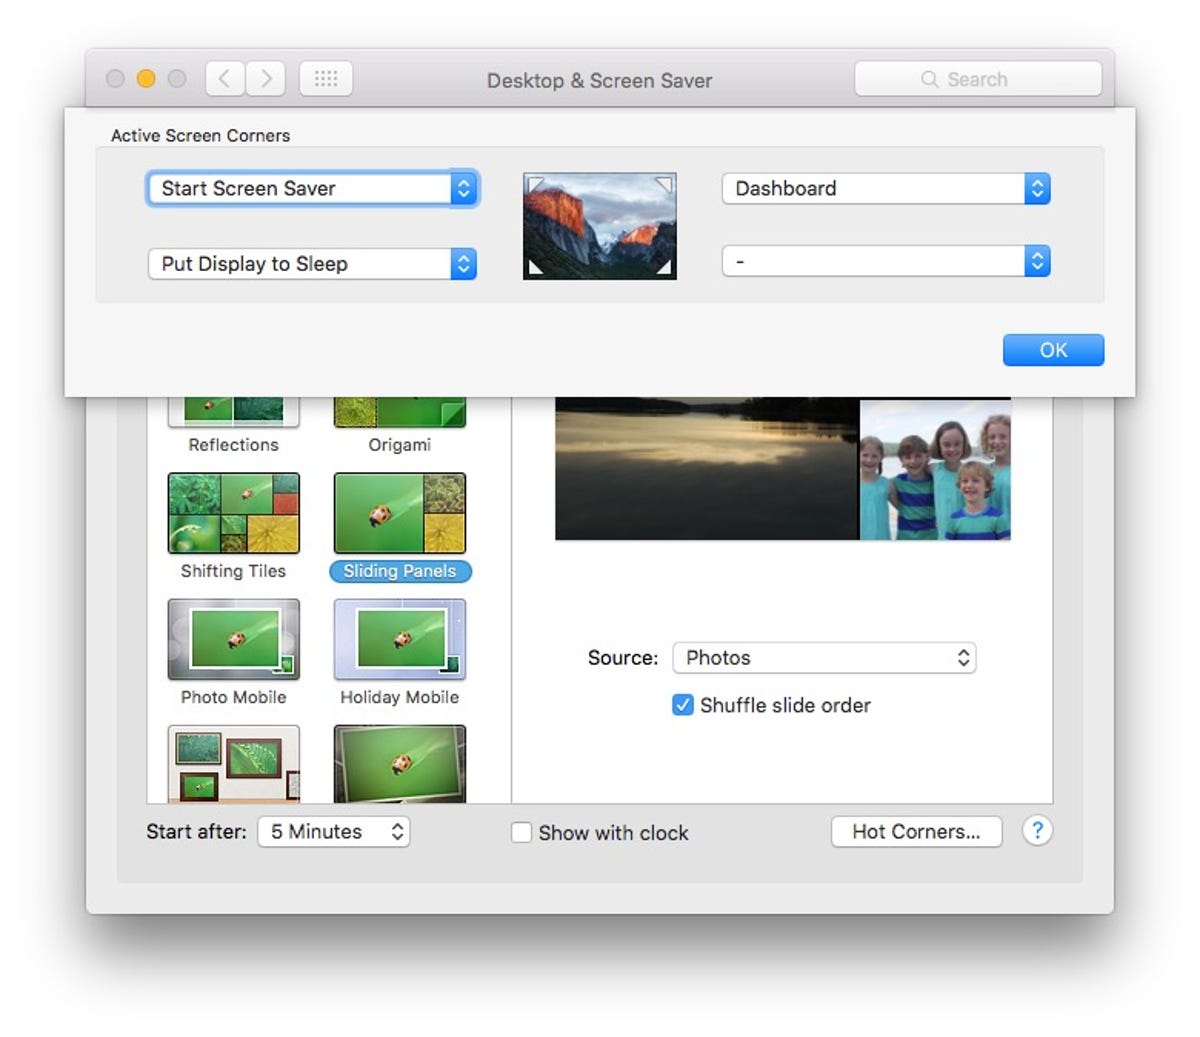
4. Hot corners
Go to System Preferences > Desktop & Screen Saver and click the Hot Corners button to assign an action when you move your cursor to one of the four corners of your screen. Choose either Put Display to Sleep or Start Screen Saver for one of the corners.
 Enlarge Image
Screenshot by Matt Elliott/CNET
5. Add icon to Dock
This one takes a little work, but you can add an icon to the Dock that starts your screensaver and locks your Mac.
- Open Finder and go to Go > Go to Folder.
- In the box, enter: /System/Library/Frameworks/ScreenSaver.framework/Versions/A/Resources/ and click Go.
- In the Resources folder that you are brought to, find the ScreenSaverEngine file and drag it to your Dock.
 Enlarge Image
Screenshot by Matt Elliott/CNET
Now, you can click the ScreenSaverEngine icon in the Dock to start your screensaver.
These last two methods will lock your MacBook, whether or not you have enabled a log-in password.
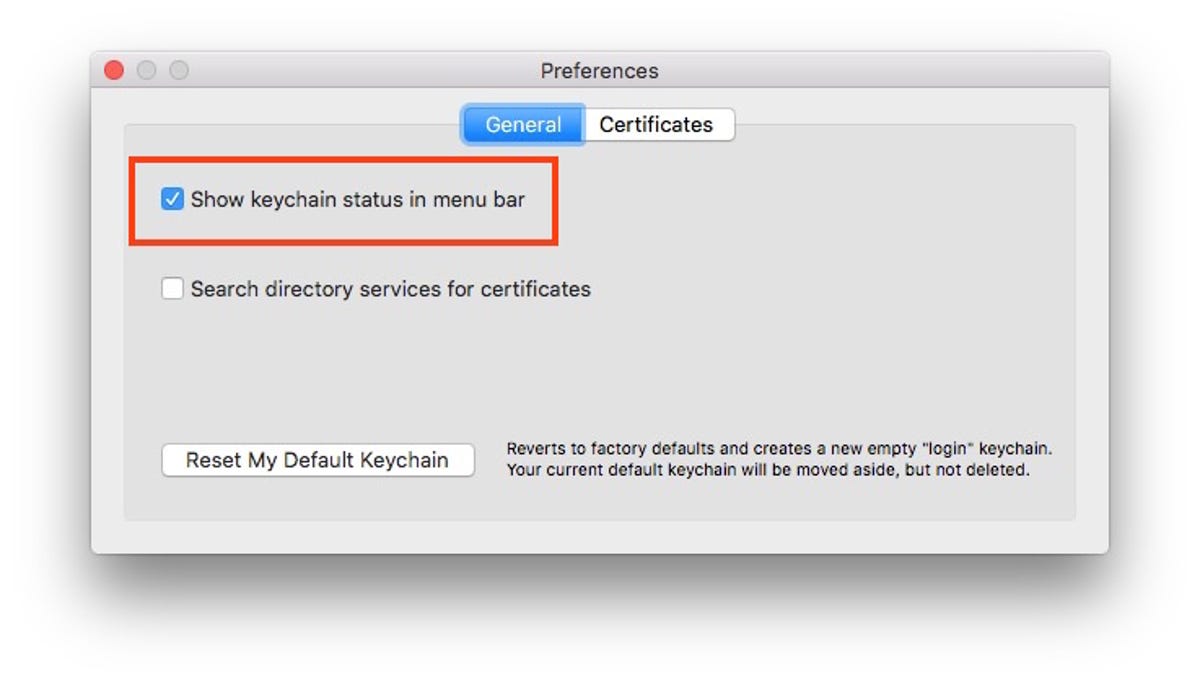
6. Keychain Access
With Keychain Access, you can add an icon to your menu bar to lock your MacBook.
- Open the Utilities folder in your Applications folder
- Open Keychain Access
- Go to Keychain Access > Preferences
- Check the box for Show keychain status in menu bar
 Enlarge Image
Screenshot by Matt Elliott/CNET
This adds a lock icon to the menu bar. Click the lock and choose Lock Screen to lock your Mac.
7. Fast User Switching
This is another menu bar option for locking your Mac.
- Go to System Preferences > Users & Groups
- Click the lock in the lower-left corner and enter your account password to make changes
- Click Login Options
- Check the box for Show fast user switch menu as. (You can choose your full name, account name or icon.)
Now, you can click your name or icon and choose Login Window to lock your Mac, whether you want to switch to another user account or lock your Mac and log back into your own account.
For more, learn how to customize your Macs lock screen. And certain PC users can log in to Windows 10 with their face.
