
Related Articles


Find files faster with Finder. With these tips, you will spend less time searching for files on your Mac.
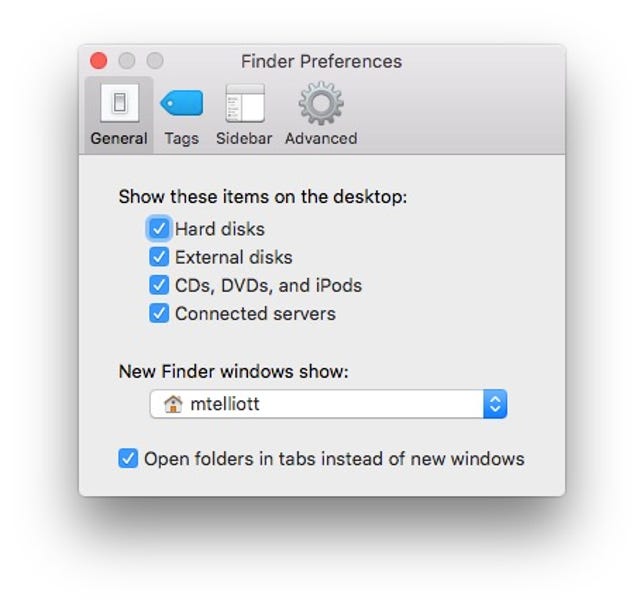
1. Set a default folder
If you navigate to a particular folder very often, then you can set it as your default and save yourself a few clicks each time you open Finder. Click on the Finder menu in the menu bar and select Preferences. Under New Finder windows show: make your selection from the drop-down menu.
 Enlarge Image
Screenshot by Matt Elliott/CNET
2. Go ‘Home’ quickly
If you head down a wormhole in your folder hierarchy in Finder, there is a keyboard shortcut that will return you to your default folder. Just hit Command-Shift-H to head immediately home.
3. Take a shortcut to trash can
Save yourself the trouble of dragging a file to the trash can in your Dock by highlighting the files or folders in Finder you’d like to trash and hitting Command-Delete. In related news, you can hit Command-Shift-Delete to empty the trash.
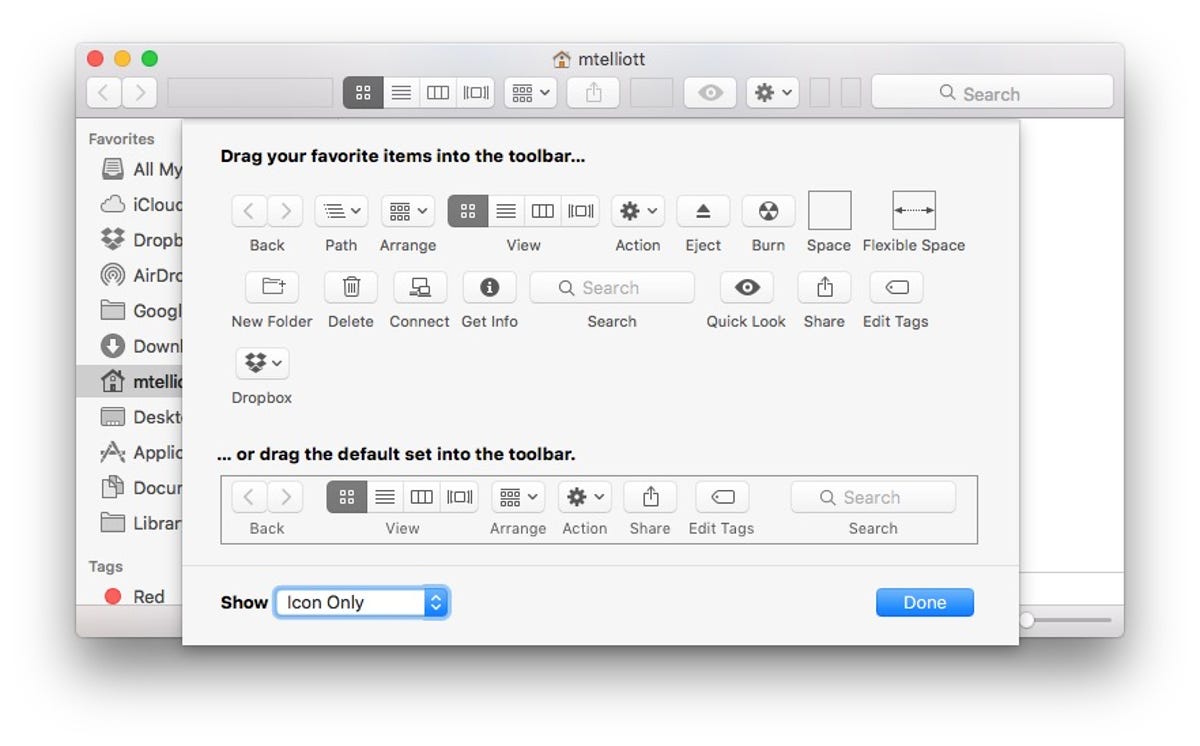
4. Customize the toolbar
From the top menu, go to View > Customize Toolbar to drag buttons to and from the toolbar at the top of Finder. If you find that you don’t like the changes you made, just drag the default set back to Finder to start again.
 Enlarge Image
Screenshot by Matt Elliott/CNET
5. View a slideshow of your photos or files
The Quick Look button (the eyeball button in the Toolbar) is useful for quickly previewing files, saving you from needing to open another app. But did you know that if you have multiple items selected (say, a group of photos), you can click the fullscreen button in the upper-left of the Quick Look window to view a slideshow of your files. You can also jump right into a full-screen slideshow by holding down the Option key when clicking the Quick Look button.
Instead of clicking the Quick Look button in the toolbar, you can just press the spacebar to view files via Quick Look or Option-spacebar to open a full-screen slideshow.
6. Adjust the width of all columns at once
There are buttons along the top of Finder to adjust the layout: icon, list, column and cover flow. In the column view, you can drag to adjust the width of a column. Hold down the Option key when you click to drag to adjust a column and you’ll be able to adjust the width of all of the columns in Finder.
7. Rename a batch of files at once
Save time and rename multiple files at once. In Finder, select your files, right-click and choose Rename X Items. You can replace or add text to the current file name or choose a custom format.
 Enlarge Image
Screenshot by Matt Elliott/CNET
8. Quickly add items to Favorites
You can drag an item to your Favorites list in the sidebar that sits on the left side of Finder. A quicker way is to select an item (or a group of items) and use the keyboard shortcut Command-Control-T to move it (or them) to your list.
While we are on the topic, you can simply drag items around your Favorites list to adjust the order. And you can drag an item off the Favorites list and drop it outside of Finder to remove it from the list. Another way to remove an item from Favorites is to right-click and choose Remove from Sidebar from the contextual menu.
9. Use this trick to locate hard-to-find files
If you are having trouble locating a file with Finder, you can filter your results to help zero in on your target. When searching in Finder, click the “+” button below the search box. This adds a line with two pull-down menus where you can choose attributes for Kind, File size or File extension to filter your results.
If none of the above three filters aid your search efforts, there is a incredibly wide world of search attributes a click away. From the Kind pull-down menu, click Other to select from dozens of specific search attributes, from Album and Alpha channel to White balance and Year recorded.
 Enlarge Image
Screenshot by Matt Elliott/CNET
You can search using multiple attributes at the same time by clicking the “+” button on the right edge of the filter line to added another filter line.
10. Stay organized by using Smart folders
Smart folders display files by search criteria you define and are updated on the fly as you change, add and remove files. To create a smart folder, open Finder and choose File > New Smart Folder (or use the keyboard shortcut Option-Command-N). Alternatively, you can just open Finder and enter a search term in the search box in the upper-right corner to start a smart folder based on a keyword. For more, read How to create and deploy smart folders in OS X.
