Now playing:
Watch this:
Make your own mini boom box
4:00
In a time where unlimited access to an infinite catalog of instantly available music, I’ve never been more sentimental about my old mixtapes. There’s something about the act of creating a mixtape that’s gone missing from today’s music culture. More than the music, a mixtape contained and symbolized the efforts of its maker — dubbing each song in real time, writing the labels, decorating the case, and taking pride in the presentation.
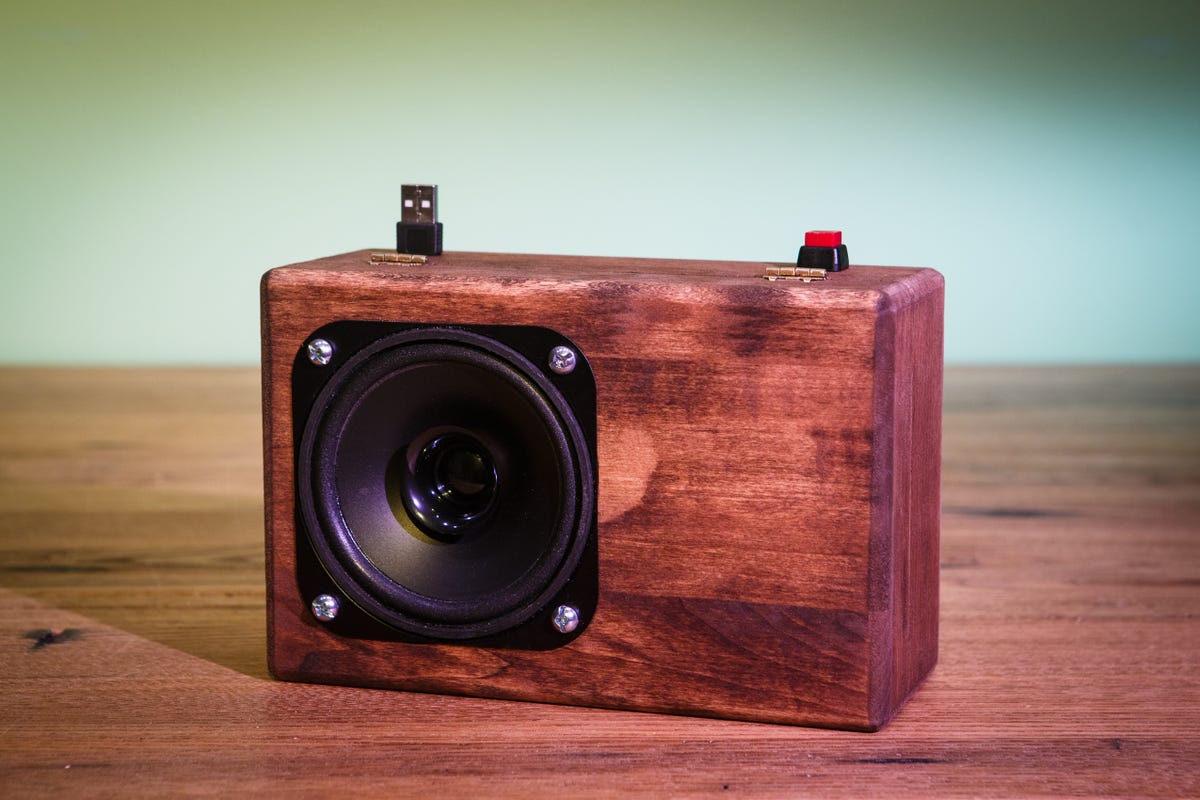
To that end, this DIY project is a way to bring back some of the mixtape’s hand-crafted magic. I’ll show you how to hack an $18 portable music player (X-Mini Happy) to power your own custom boombox. It makes a unique gift, or at least a geeky conversation piece.
Josh Miller
Materials:
- –X-Mini Happy capsule speaker w/SD card slot, $18
- -SD Card, $6
- –4-inch speaker (4 ohm), $8
- –Wood box, $15
- -Set of four bolts and nuts to attach speaker, $1
- -Momentary SPST switch, $4
- -Stranded wire, $1
- -Solder, $3
- -Hot glue sticks, $5
- -Music (MP3s)
Tools:
- -Screwdriver
- -Jeweler’s Precision screwdriver (Phillips head)
- -Router for cutting speaker hole
- -Drill
- -Pencil
- -Soldering iron
- -Glue gun
- -Wire clippers
- -Safety glasses
Donald Bell
Hacking the X-Mini
If we were to truly make our own portable, self-contained, MP3-playing boombox from scratch, you’d need a whole weekend and some serious circuit-making chops. We’re not going to do that. We’re going to cheat by taking a cheap, off-the-shelf portable music player and bending it to our needs.
Which isn’t to say that hacking the X-Mini is easy. We’re talking about a device no bigger than a tennis ball with plenty of small parts inside. If the idea of soldering, tinkering, or voiding your warranty makes you uneasy, turn back now.
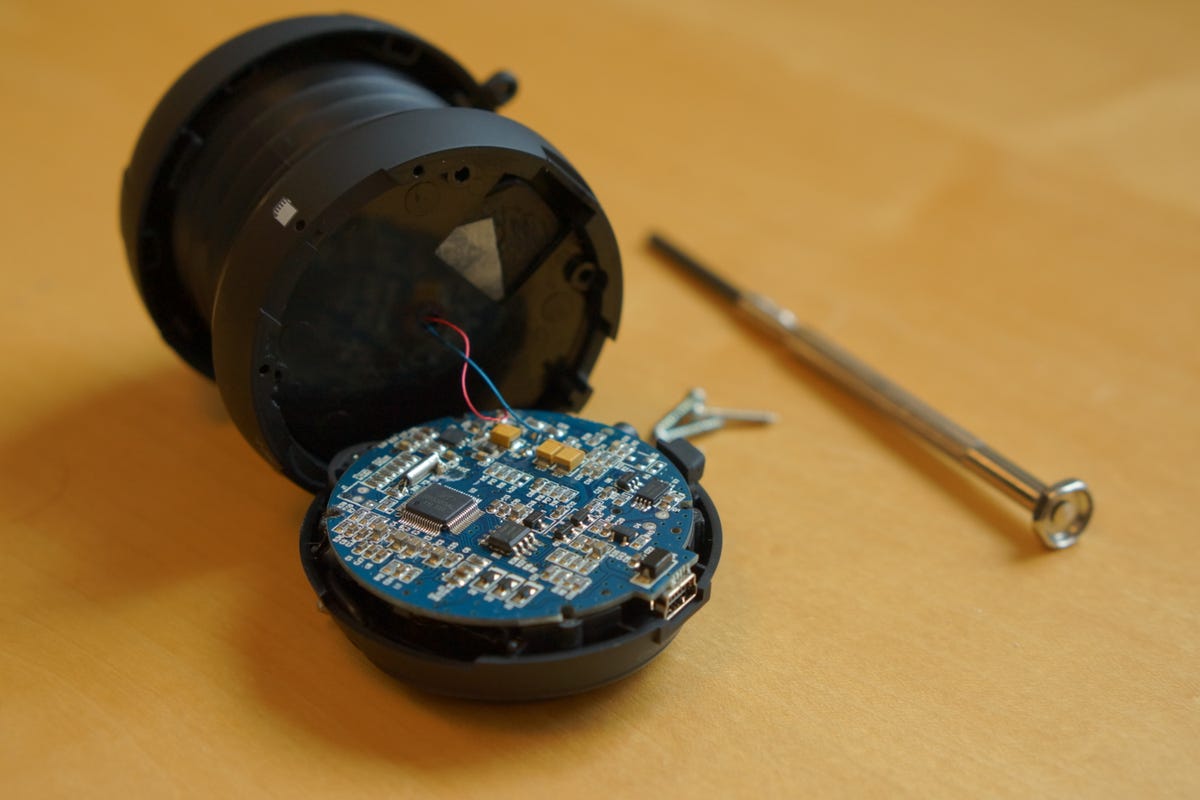
The rest of you can start by unscrewing the four screws at the base of the X-Mini’s unique accordion-style speaker chamber. You can then pull the speaker away from the base, clipping the pair of dental floss-thin wires that connect the circuit board to the speaker (which you can toss).
To trim this just down to the bare essentials, let’s also clip off the mini jack cable that’s wound into the bottom of the case. We don’t need it — plus, it will let you pull away the remaining plastic shell from the circuit board. A slow, careful prying of the glued-in rechargeable battery tucked under the circuit board is the last step in shucking this gizmo from its shell.
Donald Bell
What you’re left with is the Oreo cookie-sized guts of the X-Mini. Do me a favor and take a minute to marvel at the fact that this little handful contains an MP3 player, amplifier, and a 12-hour rechargeable battery. If this had fallen from the sky ten years ago, it would have been considered indisputable proof of advanced alien intelligence. Today, it’s an impulse buy at the grocery checkout. Progress!
Alright, now here’s all you need to know about this circuit board. Those red and blue colored strings where you snipped away the X-Mini’s speaker — that’s where you’re going to connect the new speaker. That’s the easy part. The tricky part is extending the music playback controls to a simple button that can be mounted on the outside of the box.
Mounted on the side of the X-Mini circuit board is an intricate little 3-position switch that controls volume, track skip, play/pause, and also powers the device on and off. That’s a lot of responsibility for one switch, and a real chore to reverse engineer. Fortunately, this switch is relatively hack-friendly. The trick is to break it.
Flip the circuit board bottom-up so that the side with the SD card holder is facing up. Now grab the playback switch and peel it back like you’re opening a can of soda. It should come right off and reveal what looks like a map of little flat metal roads. These are the contacts for the switch, and by making connections between them you can perform all the various functions of the switch.

The X-Mini circuit board with its switch removed, exposing the pads that you’ll use to wire your new controls.
Donald Bell
For the purpose of this project all we need is to recreate the power button, which also serves as play and pause. We can do this by wiring up a simple momentary switch (I got mine from Radio Shack) from the contact closest to the edge to the opposite contact furthest in. We’ll do this as the final step when we’re done with the enclose and have mounted the switch, so you have some time to mentally prepare yourself.
The box
Now that we’ve hacked the digital heart of this thing, it’s time to transplant it into an analog body. My choice for my boombox enclosure was a $15 unfinished walnut box with a hinged lid — the kind of thing you could pick up at any craft store.
Tracing a cut-hole for the speaker.
Donald Bell
There are some things to consider when choosing a box for this project. First, make sure the side of the box you’ll be mounting the speaker on is wide enough to accommodate the speaker. Likewise, you’ll also want to be sure it’s deep enough to fit the back of the speaker, which can be substantial depending on what type of speaker you buy.
The speaker
I picked up a 4-inch replacement car speaker on Amazon for $8. It’s capable of handling up to 50 watts of power. The X-Mini only spits out 2.5 watts, so it’s a tad overkill. The price was right, though, and it had the right boombox speaker look. Most important, the speaker’s impedance matched the X-Mini (4 ohms) and its frame could be easily mounted on the box using screws or bolts in each of its four corners.
You could also try salvaging a speaker from any old PC speakers you may have around your home or office. I pulled one out of some old Labtec PC speakers at the office and it was a 4 ohm speaker that could have handled the job with no problem (and at no cost). But I liked the look of the car speaker better.
Cutting the hole
Cutting out a hole for the speaker is one of the trickiest part of this project. If you’ve ever tried to cut out a perfect circle using paper and scissors, you get the idea. But instead of paper, you’re cutting into a ¼ inch of walnut, and instead of scissors I recommend a router with a straight bit. By using a router (instead of say, a saw) you can drop into the circle from above instead of coming in from the side.
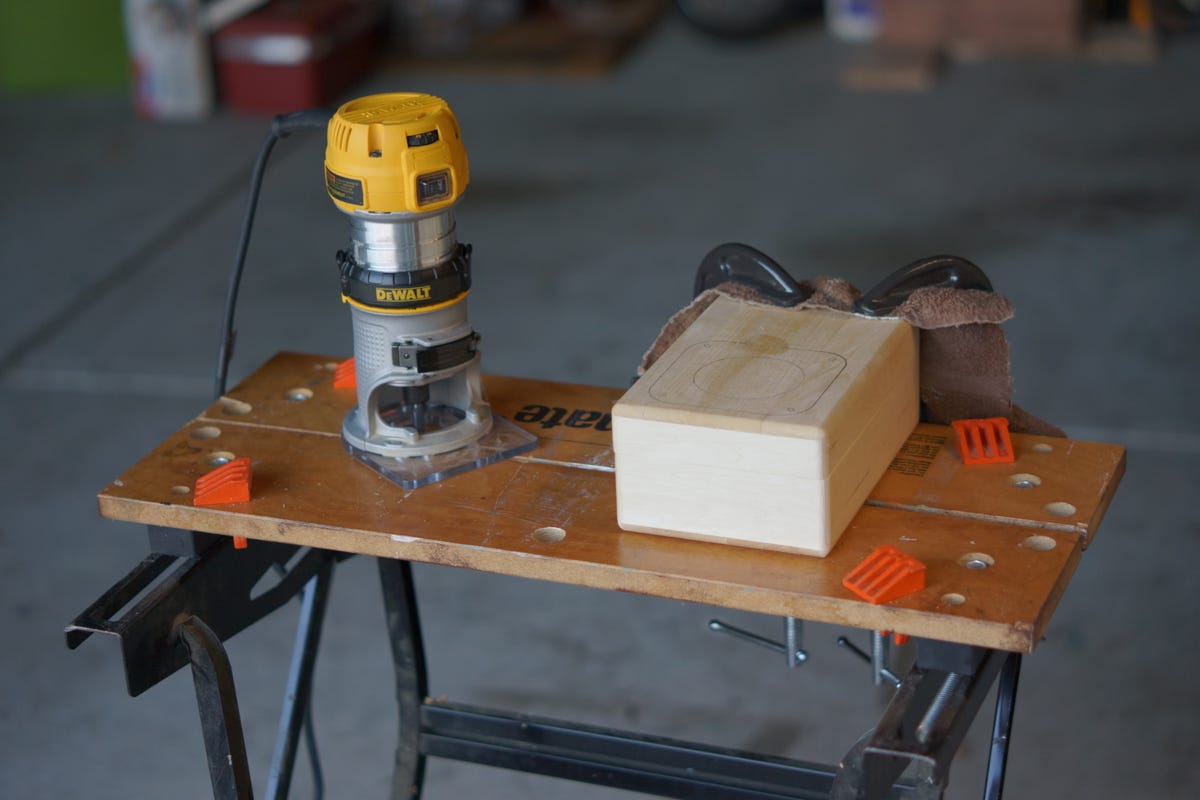
Clamping down the box before carving out a hole for the speaker.
Donald Bell
Create the guide for your circle by placing the speaker face down on the surface you intend to mount it on and tracing the edges with a pencil. Be sure to also mark where the mounting holes are for the speaker, as these will be the areas where you’ll want to leave the wood intact. Draw a rough circle within the traced area, and get cutting. So long as you don’t go outside the traced area and avoid the areas in the corner where you’ll be bolting the speaker, you’ll be in good shape. Give it a pass with the router, check to see if the speaker will fit, then repeat until the speaker fits flush against the wood.

The finished hole doesn’t need to be perfect. The lip of the speaker will conceal most imperfections.
Donald Bell
Finally, with the speaker sitting snug in the hole (and with sawdust covering everything you own), pre-drill the holes in the corners where the speaker will bolt to the box with a small drill bit that won’t damage the speaker frame. Then remove the speaker and drill the holes again with a larger drill bit that matches the diameter of the bolts or screws you’ll be using to attach the speaker. No bolts or screws are included with the speaker, so a trip to your local hardware store with your speaker in hand is the quickest way to figure out what kind of mounting hardware will work best for you.
Buttons and ports
Before you get to cleaning up the mess your router has wrought, there are two more holes to drill. You’ll need to drill a hole for the momentary switch that will turn the boombox on and off and also control play and pause. You’ll also need to drill a separate hole for the USB charging cable to pass through.

Drilling holes for buttons and USB.
Donald Bell
I went with a big, friendly button for my momentary switch (Radio Shack part #275-1566), which required a hole roughly ½-inch wide. I drilled this hole on the side of the box with the hinges, figuring it would be the side I’d least likely rest the box on. Down closer to the bottom of the same side I drilled another ½-inch hole to fish the charging cable through.
Make it yours
With the box looking like a big chunk of Swiss cheese, free from any delicate electronics, now is the time to infuse it with your unique style. Get out the glue, paint, markers, glitter, whatever you need to transform this from a simple box into something with personality.

Let’s stain this thing.
Donald Bell
I kept mine pretty tame since I knew it had to hold up to public scrutiny. I rubbed a small amount of mahogany stain inside and out to give it a kind of rustic, natural look. The result is a boombox that looks like it should be loaded up with a John Denver playlist, but I can live with that.
With a little more time (and artistic talent) I thought it would have been cool to paint this to look like a proper ’80s boombox, or maybe a little turntable, or a cassette tape.
Iron time
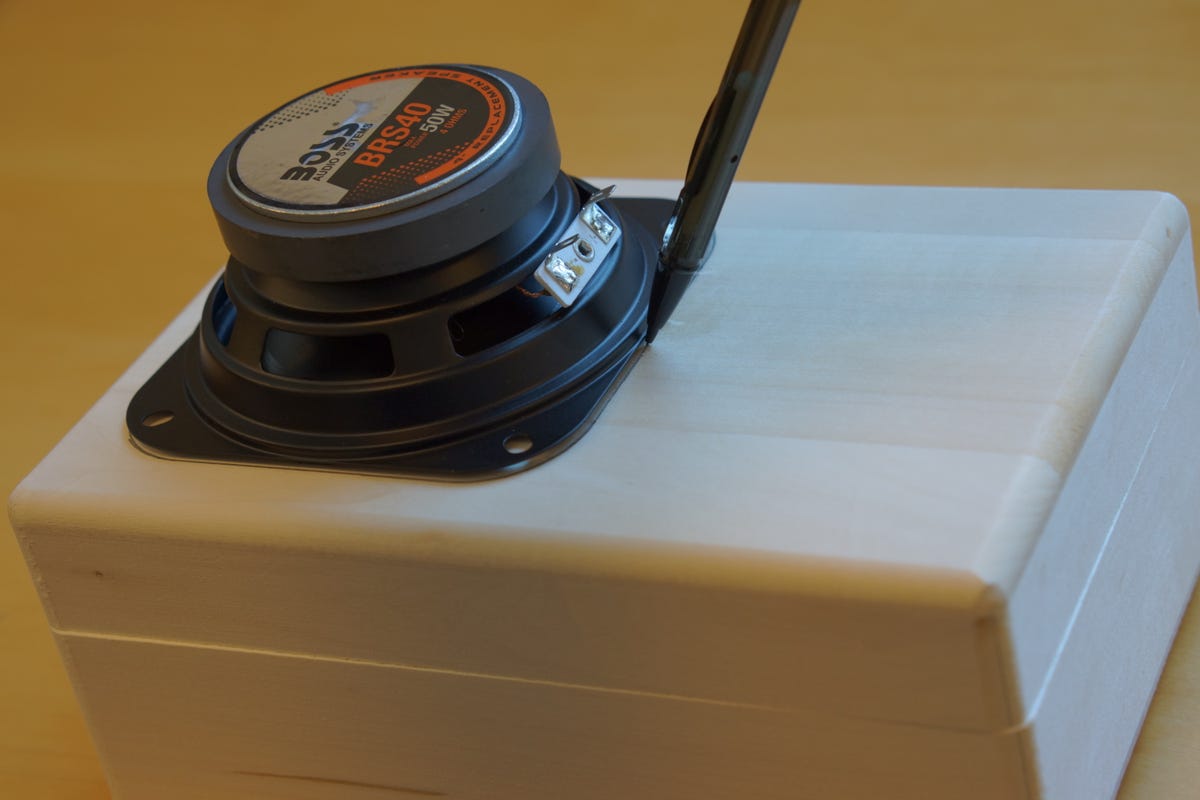
It’s time to start putting the pieces together. Mount the speaker in the hole, and bolt it into place. Slip your momentary switch into the hole you drilled and tighten it down.
While your soldering iron warms up, cut 4 pieces of stranded wire, each approximately 6 inches in length. Using different colors of wire will make it easier to keep track of what’s going on, and will make repairs easier, as well.
Speaker mounted and switch installed.
Donald Bell
Strip a small amount of the plastic sheath (1/8th-inch) off the tips of the ends of each wire to expose the metal, and then give the strands a little twist to prevent them from fraying.
With the soldering iron hot (and your safety glasses in place) solder separate wires to each of the terminals on the back of the speaker. Make a note of which terminal is positive (+) or negative (-). Now take a look at the circuit board of the X-Mini and note where you disconnected the wires that connected its original speaker. You probably still have remnants of the thin red and blue wires attached to the circuit board. The red wire represents the X-Mini’s positive speaker output (+) and blue represents negative (-).
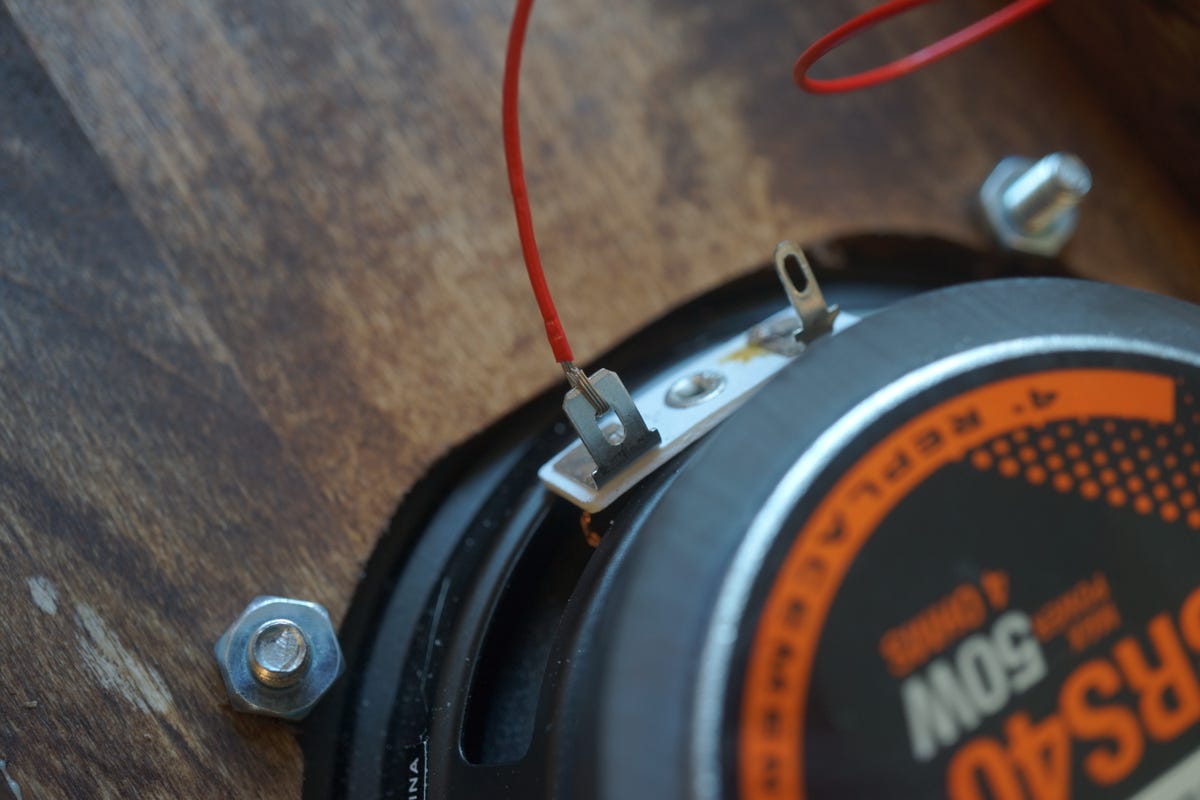
Wrapping wire on the speaker terminals before soldering in place.
Donald Bell
Starting with the red wire, use the soldering iron to heat up the solder holding it to the board and pull away the wire once the solder melts and lets it loose. Then, take the wire you’ve attached to the positive (+) terminal of the new speaker and solder the free end to the corresponding spot on the X-Mini. Repeat this same process for the negative terminal, connecting it to the negative speaker output of the X-Mini circuit board. You’ve now given the X-Mini a substantial speaker upgrade.
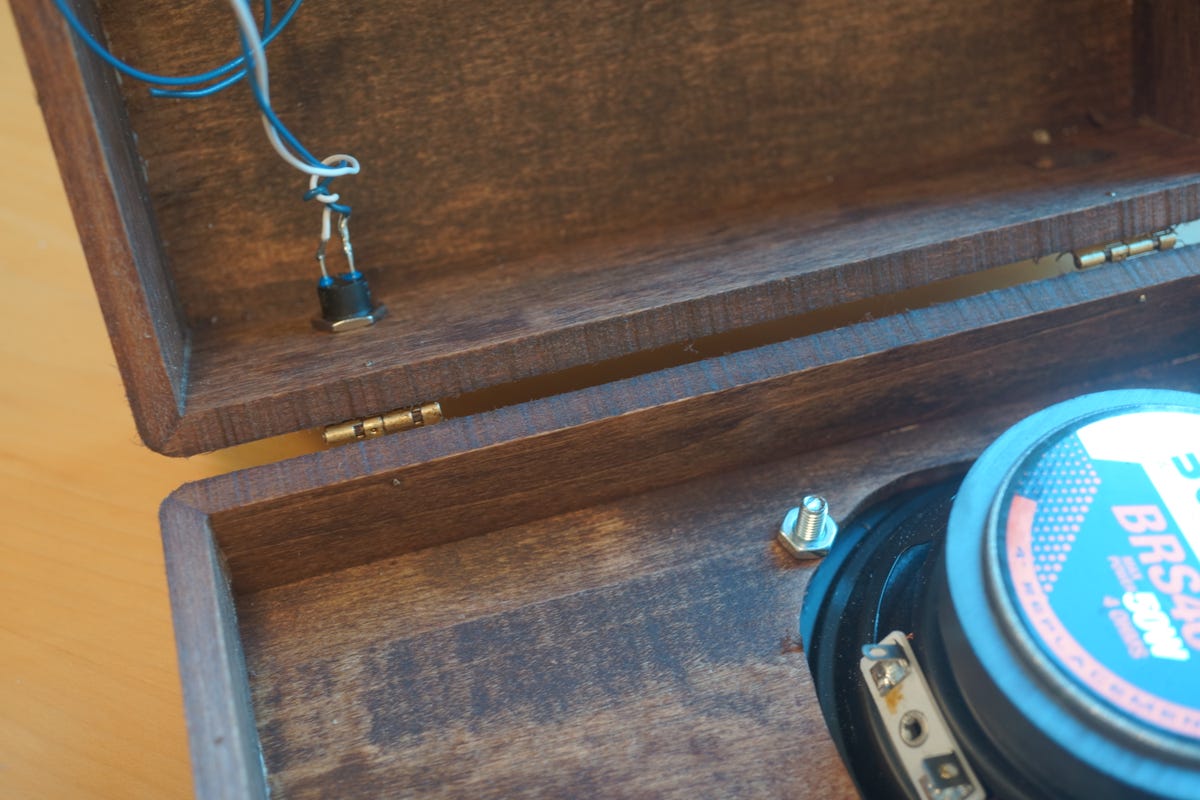
The remaining two wires are for connecting the momentary switch to the two metal contacts we uncovered by breaking apart the X-Mini’s switch at the beginning of this project. Start by soldering one end of each wire to one of the two metal posts sticking out from the bottom of the switch.
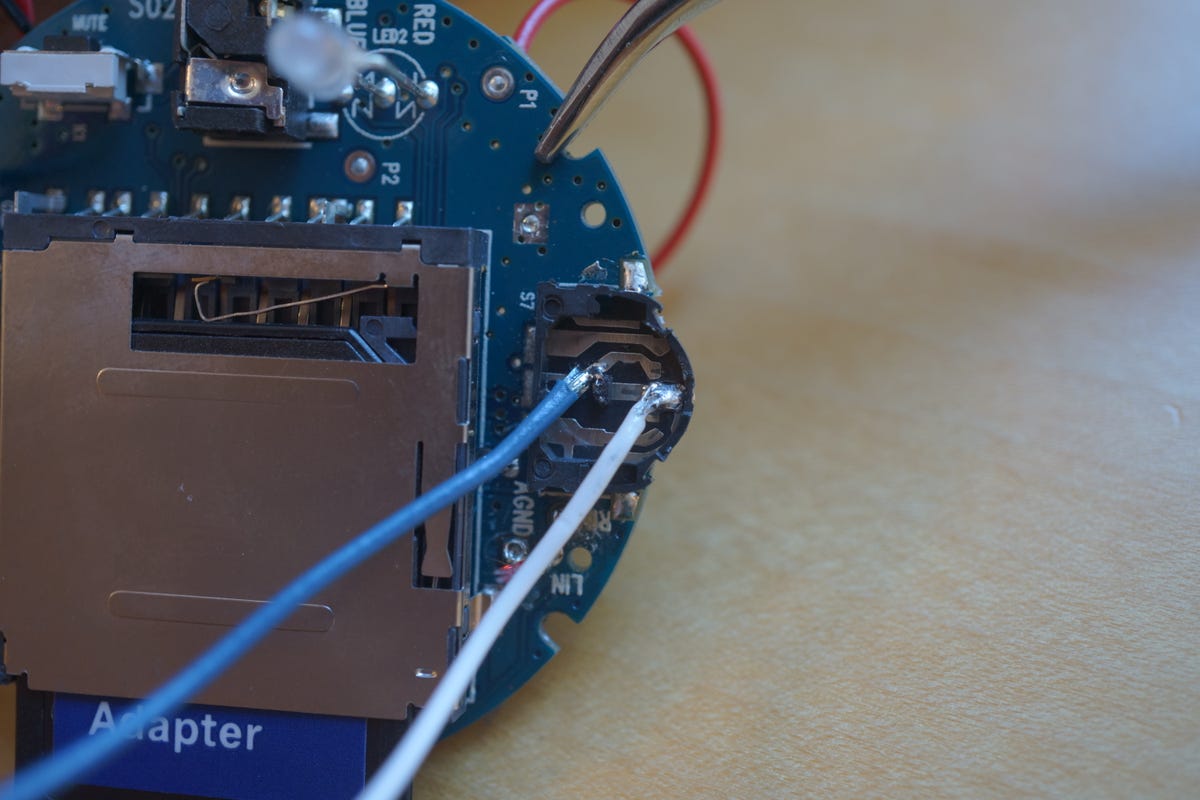
Soldering the wires from the momentary switch to the exposed pads on the X-Mini switch.
Donald Bell
Next, carefully solder the free end of one of the wires to the contact closest to the edge. Because these contacts are so small and grouped so closely, be careful not to use too much solder or you risk connecting nearby contacts accidentally. After you connect the contact at the edge, take the other wire’s free end and connect it to the opposite contact furthest in.
If all goes well, a long press of the momentary switch should turn on the X-Mini, lighting the built-in LED. A second long press will turn it off.
Showtime
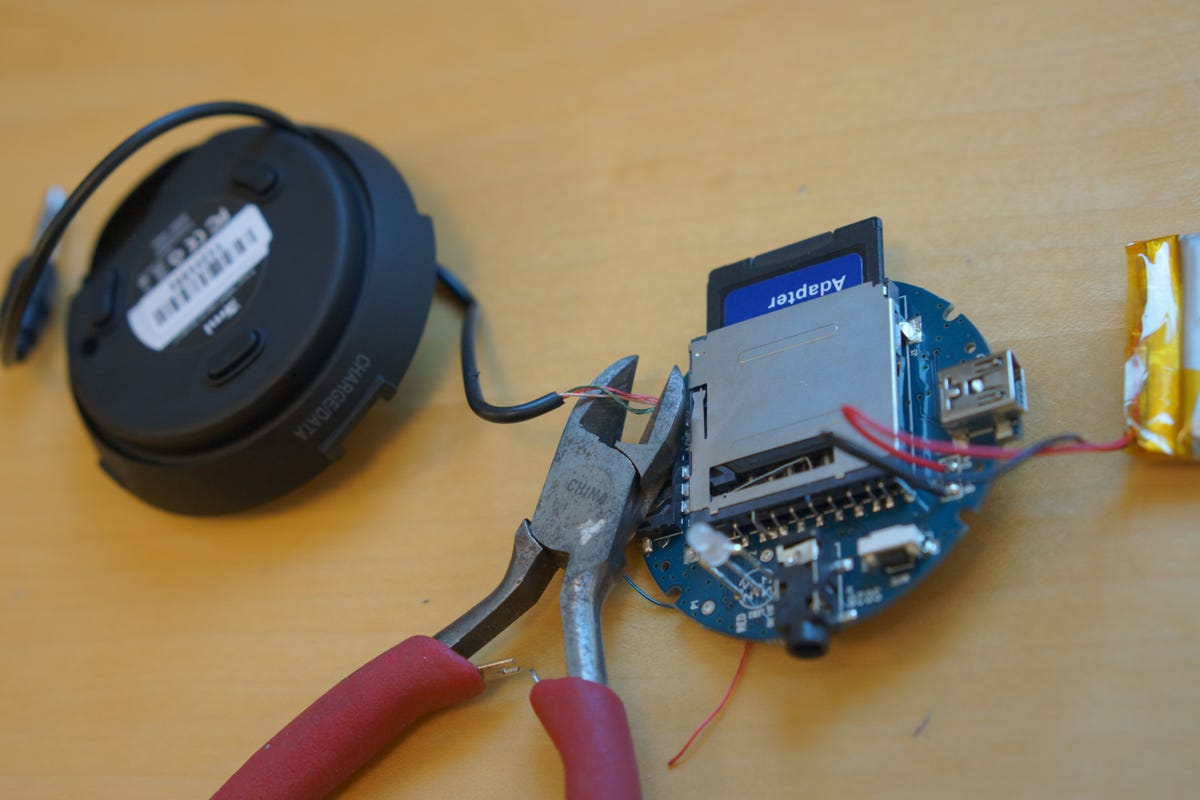
Now for the final touches. Load up your carefully curated selection of MP3 files onto the SD card and place it in the slot of the X-Mini circuit board. Then, give it a test drive using the momentary switch to turn it on, play, pause, and turn it off. With any luck, it’s all working fine. But if nothing’s playing or it won’t turn on, try the reset button on the X-Mini. You can also try charging the X-Mini using the included USB cable or popping the SD card out and gently pushing it back in.
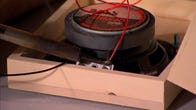
Finally, with everything working properly, I recommend using some hot glue to fix the X-Mini circuit board in place so that it doesn’t wobble around. You don’t want a connection to jostle loose or find the circuit board stuck to the magnet on the back of the speaker.
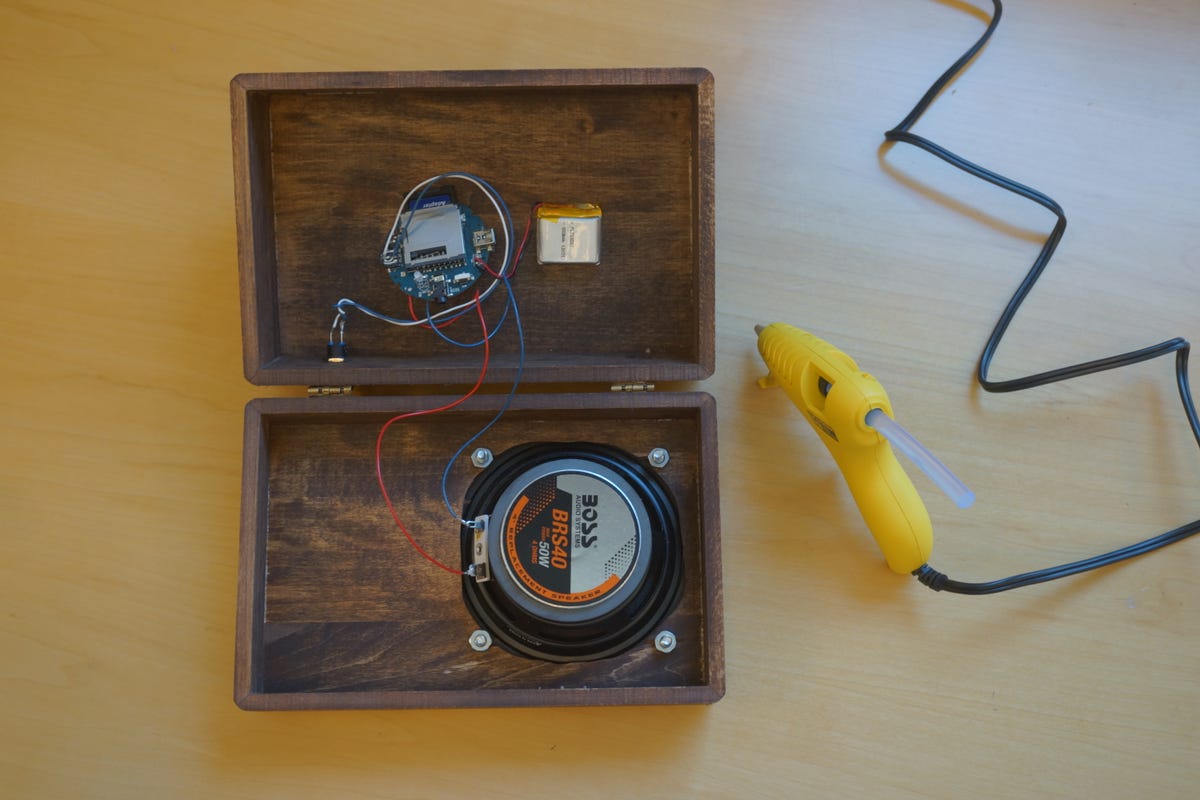
Gluing the innards in place.
Donald Bell
Before you close up the box, pull the USB cable through the hole you drilled for it and attach it to the mini USB port on the X-Mini board. The onboard battery hold around 12 hours of music playback, but you’ll eventually need to recharge it using this cable.
With the cable in place and the circuit board glued down and functioning, you can use a few drops of glue to seal the lid in place, concealing forever the hacked bits of the X-Mini inside. Wrap it up, give it to someone special, and I guarantee the music will sound sweeter for all the effort you put in it.
A version of this story appears in the new CNET Magazine.