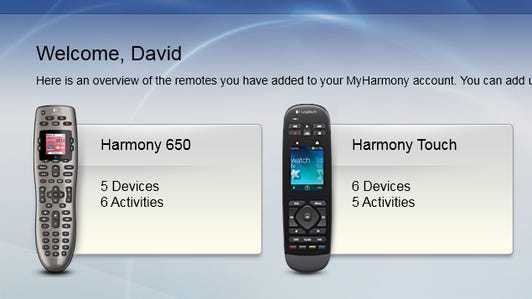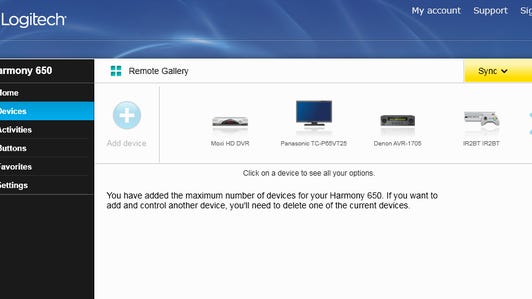
I love my Harmony 650 universal remote, but it has one major flaw. As the first line of The Bad from our review says, it can only control up to five different devices.
I hit that limit last year when I wanted to add a Roku to my system to access HBO Go. I already had five devices — a TV, an AV receiver, a Fios DVR, a PS3 (via an IR-to-BT controller), and a Moxi Mate — so I figured I’d have to “go manual” and use the Roku’s remote in conjunction with my beloved 650. Once you go universal, having to resort back to multiple clickers is a hassle akin to suddenly needing a second steering wheel to drive.
After a bit of thought, it occurred to me that, thanks to the Harmony’s ability to “learn” additional commands from the original remote controls, there’s an easy workaround that would allow me to add a sixth and potentially even more devices. The slideshow below has the full instructions and screenshots (which are repeated at the end of this article in full for reference).
Circumvent the Harmony remote device limit with this hack (pictures)


+8 more
How it works With Harmony remotes you have a limited number of devices but a basically unlimited number of so-called activities. An activity, for example “Watch TV,” is just a sequence of commands the remote sends (“turn on devices x, y, z; switch input on x”) combined with particular button associations and screen layouts (Volume keys control the AV receiver, Channel +/- keys control the cable box, etc.). The activity system is the main reason Harmony remotes are so intuitive to use.
Harmony’s learning function is designed to allow you to customize a device by adding new commands from the original device’s remote control. The workaround depends on the fact that those commands don’t necessarily have to come from the just one remote.
I could create a new “Watch Roku” activity using commands learned from the Roku remote and tacked on to one of the five devices. The commands to control my Roku would “piggy-back” atop that existing device, such as my TV, as a sort of “phantom device.” Just imagine a TV remote and Roku remote taped together. The Harmony software sees it as one device, but it actually controls two.
My wife and I have been using my “hacked” 650 to control six devices for the last year or so, and it works flawlessly. And now that Logitech has pared down its line to only three remotes — the $56 Harmony 650, the $200 Harmony Touch, and the $325 Harmony 1100 — the 650 is in my book the only one worth recommending to the non-rich. I’m in the process of reviewing the Touch right now, and suffice it to say that from a usability perspective, I can’t wait to go back to my 650.
If you were thinking of getting an affordable Harmony remote but were held back by the device limit, this hack could save you serious cash over stepping up to another Harmony.
The ‘hack’ The following steps utilize the MyHarmony.com Web site and my 650, but the concept is the same if you use the company’s standalone software (compatible with older models) or other activity-based Harmony remotes. Unfortunately it won’t work (nearly as well) for the now-discontinued other Harmonys that controlled even fewer devices, namely the 200 and 300. That’s because those two don’t support multiple activities.
- Connect your remote to your PC using a USB cable. Log onto your MyHarmony.com account and select your remote.
- Click “Your devices” and choose an existing device to “piggy-back” the new “phantom” device you want to add. Choose a device you know will be active (powered on) during the new activity you’ll create to associate with the phantom device you’re adding. I chose my Panasonic TV since I know it needs to be on to watch TV via a Roku. If you’re adding an audio-only device you may want to choose your AV receiver or home theater system instead.
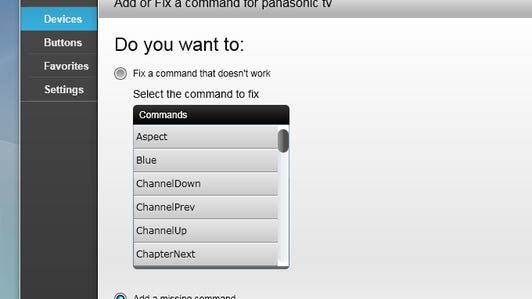
- Choose “Add or Fix a command.”
- Click the “Add a missing command” radio button and name the command. You’ll want to use a name that corresponds to one of the remote buttons of the phantom device. To avoid confusion and repetition, and to group the new commands together, I suggest you preface this and all succeeding names with a unique designation, such as “a Roku” (the “a” floats it to the top of an alphabetical list). Hit the Next button.
- Follow the instructions to “teach” the new command. The button you press on the phantom device’s remote should correspond with the name you chose in Step 4. Hit the Finish button.
- Repeat steps 3-5 for every key on the phantom device’s remote control. Don’t forget the right/left/up/down cursor keys! Only exclude keys you’re sure you’ll never use.
- Click “Home” on the upper left and choose “Your Activities,” then “Add Activity,” then “Additional Custom.” Hit “Next” and name the new activity, typically something related to your phantom device like “Watch Roku.” Hit “Next.”
- Choose the devices your new activity will use, making sure to include the “piggy-back” device you taught the new commands for the phantom device (such as the TV). Choose the inputs as instructed, and hit “Finish.”
- Click “Buttons” in the upper left, click the down arrow next to the second pull-down menu (the one below “Change what a button does”), and select the activity you created in Step 7.
- On the “Change What a Button Does” screen under “Device,” choose the piggy-back device. Follow the instructions to assign all of those new phantom commands to the buttons you want. Hit “OK” when finished.
- Repeat steps 9 and 10, but instead use the first pull-down menu on the “Buttons” screen, the one under “Change your screen options.”
- [Optional. Perform this step only if your phantom device needs to be turned on and off along with the activity. For some devices like Roku that stay “on” all the time, this step isn’t necessary.] Hit “Activities” on the left menu, select the new activity and hit “Customize this activity.” Under “Activity startup commands” choose “Add step,” select the piggy-backed device, choose “IR Command” under “Action,” and the new command for Power on your phantom device under “Value.” Repeat for “Activity shutdown commands.”
- Sync your changes using the yellow pull-down in the upper right.
Congrats, you’ve just circumvented Logitech’s arbitrary device limit!


